splendide washer dryer combo manual

Welcome to the Splendide Washer Dryer Combo Manual, your comprehensive guide to understanding and operating the WDC7100XC model. This manual provides detailed instructions for installation, operation, and maintenance, ensuring optimal performance and longevity of your appliance. Discover how to make the most of its advanced features, troubleshoot common issues, and access support when needed. Designed for both first-time users and experienced owners, this manual is essential for maximizing efficiency and convenience in your laundry routine.

Overview of the Splendide Washer Dryer Combo

The Splendide Washer Dryer Combo is a versatile, space-saving appliance designed for efficient laundry processing. Combining washing and drying functions in one unit, it offers convenience for small spaces like RVs or apartments. With front-loading design, multiple wash cycles, and energy-efficient operation, it simplifies laundry tasks. The WDC7100XC model features advanced controls, HE detergent compatibility, and optimal water usage, making it ideal for modern households seeking practicality and performance. Its compact size and robust functionality ensure it meets diverse user needs effectively.

Importance of Reading the Manual

Reading the Splendide Washer Dryer Combo Manual is essential for safe and effective use of your appliance. It provides critical information on installation, operation, and maintenance, ensuring you avoid common mistakes. The manual details safety precautions, optimal detergent usage, and troubleshooting tips to prevent errors and extend the appliance’s lifespan. Understanding the warranty terms and support options also helps you make informed decisions. By following the guidelines, you can maximize efficiency, prevent damage, and enjoy hassle-free laundry experiences. It’s a vital resource for both new and experienced users to get the most out of their unit.

Installation and Setup

Proper installation is crucial for safe and efficient operation. Follow the manual’s step-by-step guide to unpack, remove transit screws, level, and install the washer-dryer correctly.

Unpacking the Washer Dryer

Begin by carefully removing the washer-dryer from its packaging. Inspect the appliance for any damage sustained during shipping and ensure all accessories are included. Gently lift the unit to avoid personal injury or further damage. Once unpacked, verify that all components, such as the power cord and installation hardware, are present. If any damage or missing parts are found, contact the retailer immediately. Proper unpacking ensures a smooth installation process and prevents potential issues during operation.

Removing Transit Screws

To prepare your washer-dryer for installation, remove the transit screws. Locate the back panel and take out the screws securing it. Lift the panel to access the transit brackets. Using the provided spanner, remove the fixing screws from the brackets on all four sides. Once the brackets are detached, ensure the appliance is stable and level. Proper removal of transit screws prevents damage during installation and ensures safe operation. Always refer to the manual for specific instructions tailored to your model, such as the WDC7100XC.

Leveling the Appliance

Proper leveling of your Splendide washer-dryer is essential to ensure stable operation and prevent vibration. Use the adjustable feet to align the appliance with the floor. Place a spirit level on top of the machine to check balance. Adjust the feet as needed until the appliance is perfectly level. Ensure the surface is firm and even to support the weight. Proper leveling prevents excessive noise and ensures optimal performance. Always verify the surface is level before finalizing the installation to avoid any operational issues.

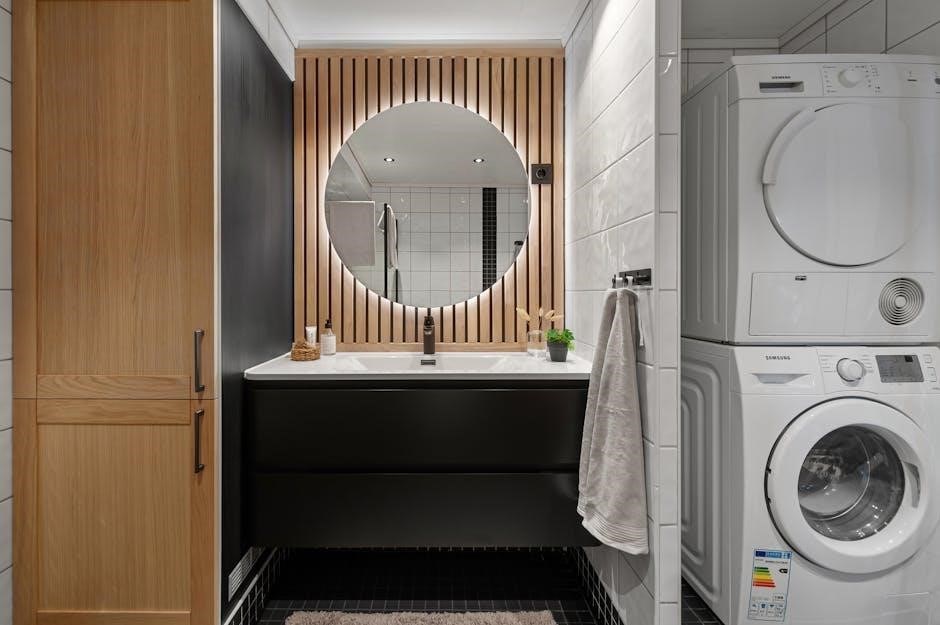
Installing the Washer Dryer

After leveling, secure the washer-dryer in its designated space. Connect the water supply lines to the rear ports, ensuring they are tightly fitted to avoid leaks. If vented, attach the venting system according to the manual’s instructions. Plug the appliance into a grounded electrical outlet. Use the provided installation kit or purchase one from Splendide for specific needs. Double-check all connections for stability and proper alignment. Ensure the surface is strong and level to support the appliance’s weight. Refer to the manual for detailed installation steps to ensure a safe and proper setup.

Operating Instructions

Operate your Splendide Washer Dryer Combo with ease by following the control panel guide. Select wash and dry cycles, adjust settings, and monitor progress. Always use HE detergent, optimal load sizes, and ensure proper water pressure for best results. Refer to the Wash Cycle Table and Dry Cycle Options for detailed settings. Regularly clean filters and maintain the appliance to ensure efficient performance and longevity. Troubleshoot common issues using the provided chart or contact support if needed.

Control Panel Overview

The Splendide Washer Dryer Combo features an intuitive control panel designed for easy operation. The panel includes buttons for selecting wash and dry cycles, adjusting temperature, and enabling special functions like delicate or bulky loads. A clear digital display shows the selected settings and cycle progress. Use the dial or buttons to navigate through options, ensuring precise control over your laundry process. The control panel also alerts you to errors or maintenance needs, guiding you to resolve issues quickly. Refer to the Wash Cycle Table and Dry Cycle Options sections for detailed cycle descriptions and settings.

Wash Cycle Table

The Wash Cycle Table in the Splendide Washer Dryer Combo Manual outlines the various wash options available, including normal, delicate, bulky, quick wash, and heavy-duty cycles. Each cycle is designed for specific fabric types and soil levels, ensuring optimal cleaning. Temperature settings range from cold to hot, catering to different laundry needs. The table also highlights special features like pre-wash, rinse-and-spin, and eco-mode. Refer to this table to select the most suitable cycle for your load, ensuring efficient and gentle cleaning of your garments. Proper cycle selection enhances fabric care and machine performance;

Dry Cycle Options

The Splendide Washer Dryer Combo offers a variety of dry cycle options to suit different fabric types and drying needs. Choose from options like delicate, normal, bulky, and quick dry cycles. The appliance also features advanced temperature settings, including low, medium, and high heat, as well as an air-dry option for sensitive fabrics. Special features include a moisture-sensing system that automatically adjusts drying time and a vented drying option for efficient moisture removal. These options ensure your clothes are dried gently and thoroughly, preserving fabric quality and reducing wrinkles. Proper cycle selection enhances drying efficiency and fabric care.

Best Practices for Usage

Always use HE detergent for optimal performance. Ensure optimal load sizes to prevent damage and maintain efficiency. Check water pressure recommendations to avoid operational issues. Regular maintenance and proper usage extend the appliance’s lifespan and ensure reliable operation. Consult the manual for specific guidelines to achieve the best results from your Splendide Washer Dryer Combo.

Using HE Detergent

Using HE detergent is essential for optimal performance of your Splendide Washer Dryer Combo. HE detergents produce fewer suds, reducing the risk of clogging and improving drainage. Use the recommended amount to avoid residue buildup and maintain efficiency. Excess detergent can lead to poor wash results and increased maintenance. Always follow the guidelines in the manual for proper dosage. This ensures cleaner clothes, better appliance performance, and a longer lifespan for your washer-dryer combo. Proper detergent usage is key to achieving the best results in every cycle.

Optimal Load Sizes

Optimal load sizes are crucial for efficient performance of your Splendide Washer Dryer Combo. Avoid overloading, as this can lead to poor cleaning results and increased wrinkling. Clothes need space to move freely for proper washing and drying. Aim for a load size that fills the drum to 2/3 to 3/4 of its capacity. Separate delicate items from bulkier fabrics to ensure even cleaning and prevent damage. Proper load sizing enhances cleaning efficiency, reduces wear on the appliance, and helps maintain energy efficiency for optimal results.

Water Pressure Recommendations

Proper water pressure is essential for the efficient operation of your Splendide Washer Dryer Combo. The recommended water pressure range is between 10 PSI and 120 PSI. Ensure the water supply lines are fully opened and free from obstructions. If your water supply pressure is too high or low, consider installing a water pressure regulator to stabilize the flow. This helps maintain optimal performance, prevents damage to the appliance, and ensures consistent cleaning and rinsing results. Always check and adjust the water pressure settings as needed for your specific setup.

Care and Maintenance

Regularly clean the appliance and check filters to ensure optimal performance. Refer to the manual for detailed maintenance instructions to prolong the life of your washer-dryer combo.

Cleaning the Appliance

Regular cleaning is essential to maintain your Splendide washer-dryer combo’s performance. Remove debris from the gasket and detergent dispenser after each use. Run a cleaning cycle monthly using a washer cleaner or vinegar to eliminate odors and residue. Check and clean the drain pump filter regularly to ensure proper water flow. For tougher stains, mix baking soda and water for a natural cleaning solution. Always refer to the manual for specific cleaning recommendations to keep your appliance in top condition and prevent maintenance issues.

Drain and Filter Maintenance

Regular drain and filter maintenance ensures smooth operation and prevents issues. Check the drain pump filter monthly to remove lint and debris. Locate the filter at the bottom of the washer-dryer, turn off power, and rinse it thoroughly. Ensure the drain hose is securely connected and not kinked. For optimal performance, clean the filter after every 30 cycles. Proper maintenance prevents clogs and odors. Refer to the manual for specific guidance on accessing and cleaning these components effectively.

Regular Servicing Tips

Regular servicing is crucial to maintain the performance and longevity of your Splendide washer-dryer. Check and replace worn-out parts like door seals and gaskets annually. Ensure the venting system is clear and functioning properly to avoid moisture buildup. Every 6 months, run a cleaning cycle with a washer cleaner to remove detergent residue. Schedule professional servicing once a year to inspect internal components. Always refer to the manual for specific servicing recommendations and contact Splendide support if you notice unusual wear or performance issues.

Troubleshooting Common Issues

For the Splendide WDC7100XC, common issues include error codes, poor washing performance, or drying inefficiency. Always check the troubleshooting chart in the manual for solutions. Verify water pressure, ensure the vent is clear, and clean filters regularly. If issues persist, contact Splendide support for assistance. Regular maintenance and proper usage can prevent many problems, ensuring optimal performance.

Troubleshooting Chart

The Splendide Washer Dryer Combo Manual includes a detailed troubleshooting chart to help diagnose and resolve common issues. Refer to this chart for error codes, such as E1, E2, or E3, which indicate problems like low water pressure or obstruction in the vent. Each error code is paired with a solution, such as checking water supply lines or cleaning the filter. Additionally, the chart addresses issues like poor washing or drying performance, offering steps to ensure proper detergent usage and vent clarity; Regularly reviewing this chart can help prevent and quickly fix problems, ensuring efficient appliance operation.

Resolving Common Errors

The Splendide Washer Dryer Combo Manual provides practical solutions for addressing common errors. Issues like poor washing performance or excessive wrinkling can often be resolved by adjusting load sizes or ensuring proper detergent usage. If error codes appear, such as E1 (low water pressure) or E3 (vent obstruction), refer to the troubleshooting chart for step-by-step fixes. Regularly cleaning the filter and checking the vent system can prevent many issues. For persistent problems, contact Splendide Support for assistance, ensuring your appliance runs efficiently and effectively. Always follow the manual’s guidelines for optimal results.

When to Contact Support

Contact Splendide Support if you encounter issues beyond basic troubleshooting. Reach out for complex errors, persistent problems, or if the appliance is damaged during unpacking. Call 1-800-356-0766 or email splendide for professional assistance. Ensure you have your model number and a detailed description of the issue ready for faster resolution. Support is available to address warranty claims, repair needs, and technical queries, ensuring your washer-dryer operates efficiently and effectively.

FAQs and Sample Loads

Find answers to common questions about the Splendide Washer Dryer Combo and discover optimal load sizes for efficient washing and drying. Ensure best results with HE detergent.

Frequently Asked Questions

Common queries about the Splendide Washer Dryer Combo include optimal detergent usage, load size recommendations, and troubleshooting tips. Users often ask about HE detergent requirements, ensuring efficient cleaning without exceeding capacity. Another frequent question is how to resolve common errors, such as improper water pressure or lint buildup. Additionally, many inquire about maintenance routines, like cleaning filters and drains, to maintain performance. For detailed answers, refer to the troubleshooting chart and product guidelines provided in the manual for optimal appliance care and operation.

Sample Load Guidelines

For optimal performance, the Splendide Washer Dryer Combo recommends balancing loads according to fabric type and weight. A typical load includes 3-4 lightweight items like shirts or towels. For bulkier items, such as jeans or bedding, reduce the load size to 2-3 pieces. Delicates should be washed separately in smaller quantities. Always use HE detergent and avoid overloading to ensure efficient cleaning and drying. Check fabric labels for specific care instructions to prevent damage and maintain appliance efficiency.

Warranty and Support

Every Splendide washer-dryer comes with a Limited Warranty; Read the warranty statement for complete details. Contact Splendide Support at 1-800-356-0766 or email splendide@westlandsales.com for assistance with any inquiries.

Understanding the Limited Warranty

Your Splendide washer-dryer combo is protected by a Limited Warranty, which covers defects in materials and workmanship for a specified period. This warranty is non-transferable and applies only to the original purchaser. It does not cover damage caused by misuse, neglect, or improper installation. For complete details, refer to the warranty statement provided with your appliance. Contact Splendide Support for any questions or concerns about your warranty coverage.

Contacting Splendide Support

For assistance with your Splendide washer-dryer combo, contact their support team at 1-800-356-0766 or via email at splendide@westlandsales.com. Visit their website for additional resources, including manuals and troubleshooting guides. Splendide’s office is located at 15650 SE 102nd Ave, Clackamas, OR 97015. Ensure you have your model number and a detailed description of your issue ready when reaching out. Their team is available to address warranty claims, repair needs, and general inquiries to help you maintain your appliance effectively.

Additional Resources

Download the Splendide Washer Dryer Combo Manual from the official website or access AI-powered Q&A support for instant answers. Visit splendide.com for guides, FAQs, and troubleshooting tools.

Downloading the Manual

To access the Splendide Washer Dryer Combo Manual, visit the official Splendide website. Navigate to the support section and enter your model number (e.g., WDC7100XC) to download the PDF. Ensure you select the correct version for your appliance. The manual is also available through AI-powered Q&A platforms, offering instant answers and troubleshooting guides. For convenience, save the manual to your device for quick reference. This ensures you always have access to operating instructions, care tips, and warranty details whenever needed.

Online Support and Guides

For additional assistance, Splendide offers extensive online support and resources. Visit their official website to access FAQs, troubleshooting guides, and detailed user manuals. AI-powered Q&A platforms provide instant answers for common queries. Video tutorials and interactive guides are also available to help you understand your appliance better. Furthermore, online forums and communities allow you to connect with other users and share tips. For technical issues, contact Splendide support directly via phone or email for personalized assistance. These resources ensure you can resolve issues and optimize your washer-dryer’s performance effortlessly.

Final Tips for Optimal Use

For the best experience with your Splendide Washer Dryer Combo, always use HE detergent, avoid overloading, and ensure proper ventilation. Regularly clean filters and check water pressure to maintain performance. Refer to the manual for troubleshooting common issues and schedule annual servicing. By following these tips, you’ll extend the appliance’s lifespan and enjoy efficient, worry-free laundry cycles. Happy washing!

roomba 960 owners manual

iRobot Roomba 960 Owners Manual⁚ A Comprehensive Guide

This manual provides a complete guide to using your Roomba 960. Learn about safety, setup, cleaning modes, app control, maintenance, troubleshooting, and more. Download the full PDF for detailed instructions and helpful tips.

Safety Precautions and Important Information

Before operating your iRobot Roomba 960, carefully review these essential safety precautions to ensure safe and effective use. Keep the Roomba away from children and pets during operation. Never place objects on top of the Roomba or obstruct its sensors. Do not attempt to repair the Roomba yourself; contact iRobot support for any issues. Always use the provided power adapter and charging station. Avoid operating the Roomba in wet or damp conditions, and ensure the charging contacts are clean and dry.

The Roomba’s cleaning brushes can be a potential entanglement hazard for long hair or cords; keep these away from the cleaning path. Be aware of the Roomba’s cleaning path and ensure it does not pose a tripping hazard. The Roomba’s battery should only be replaced or serviced by authorized personnel. Do not disassemble the Roomba or attempt to modify its internal components. Always follow the instructions provided in this manual to avoid damage to the unit or personal injury. Proper use and maintenance will extend the life of your iRobot Roomba 960. Consult the full manual for further details and warnings.

Remember, this device is intended for household use only; Never use it in an industrial or commercial environment. Always disconnect the power adapter when not in use or during cleaning and maintenance. Improper use can void the warranty and may lead to malfunction or damage. Regularly inspect the Roomba for any signs of damage before each use. For questions or concerns, contact iRobot customer support for assistance.

Getting Started⁚ Unboxing and Initial Setup

Unboxing your iRobot Roomba 960 is simple. Carefully remove the robot vacuum, home base, and power adapter from the packaging. Inspect all components for any damage. If any damage is found, contact iRobot customer support immediately. The Home Base should be placed on a flat, stable surface near an electrical outlet, ensuring adequate space around it for the Roomba to dock easily. Plug in the power adapter to the Home Base and then into a wall outlet. The power indicator on the Home Base should illuminate.

Before initial use, fully charge the Roomba 960 by placing it on the Home Base. The charging indicator light on the Roomba will indicate the charging status. Allow the Roomba to charge completely (this usually takes several hours) before attempting to use it for the first time. Download and install the iRobot HOME app on your smartphone or tablet (available for iOS and Android); The app will guide you through the Wi-Fi connection setup process. You will need your home’s Wi-Fi network name (SSID) and password to connect the Roomba to your home network. Once connected, you can control and schedule cleaning sessions through the app;

Familiarize yourself with the Roomba’s buttons and indicators. The “Clean” button initiates a cleaning cycle. The “Dock” button sends the Roomba back to the Home Base. Consult the full manual for detailed explanations of all buttons and functions. After setup is complete, you are ready to start enjoying the convenience and efficiency of your iRobot Roomba 960. Remember to refer to the app and the full manual for additional setup and troubleshooting information.

Charging the Roomba 960 and the Home Base

The Roomba 960’s Home Base serves as both a charging station and a docking station. Ensure the Home Base is placed on a flat, stable surface, away from obstacles and with enough clearance for the Roomba to easily navigate to and from it. Connect the power adapter to the Home Base and then plug it into a wall outlet. The power indicator light on the Home Base should illuminate, indicating that power is supplied. Before initial use, fully charge the Roomba 960 battery. Place the Roomba on the Home Base, ensuring its charging contacts align correctly with those on the Home Base. The Roomba’s charging indicator light will illuminate, showing the charging status.

A fully charged battery typically takes several hours. The charging indicator light will change to a solid light or turn off once the battery is fully charged. During normal operation, the Roomba will automatically return to the Home Base to recharge when its battery level is low. The Roomba will resume its cleaning cycle once sufficient charge is restored. Do not use the Roomba while it’s charging. Always ensure the power adapter is securely connected to both the Home Base and the wall outlet. Avoid placing the Home Base in areas exposed to direct sunlight or extreme temperatures.

Regularly inspect the charging contacts on both the Roomba and the Home Base for any dirt or debris. Clean them gently with a soft, dry cloth if necessary. Maintaining clean contacts ensures efficient charging and prevents potential charging issues. Refer to the iRobot HOME app and the complete user manual for additional information regarding battery care and troubleshooting charging problems. Proper charging practices will maximize the lifespan of your Roomba 960’s battery.

Understanding the Cleaning Modes and Controls

The iRobot Roomba 960 offers several cleaning modes to suit your needs. The primary control is the CLEAN button located on the robot. Pressing this button initiates a cleaning cycle. By default, this initiates a full room cleaning. However, the Roomba 960 also allows for customized cleaning schedules and areas via the iRobot HOME app. The app provides options for spot cleaning, focusing on a specific area, and scheduling cleaning sessions for your convenience. The Roomba 960 utilizes advanced sensors and navigation to efficiently cover your floors.

During cleaning, the Roomba systematically navigates your space, employing its iAdapt 2.0 Navigation technology to map the room and plan its cleaning path. Visual cues, such as indicator lights on the robot and within the app, provide real-time feedback on the cleaning process and the robot’s battery status. The Roomba 960 will automatically return to its Home Base to recharge when necessary, resuming cleaning once sufficient charge is restored. The app provides detailed information about the cleaning session, including the area covered and the duration of the cleaning cycle. You can also use the app to pause or stop the cleaning process at any time.

Understanding the various cleaning modes and the controls is vital for effective cleaning. Familiarize yourself with the features of the iRobot HOME app to take full advantage of the Roomba 960’s capabilities; Experiment with different cleaning modes to determine which best suits your home and cleaning preferences. Remember to always refer to the complete user manual for comprehensive details about the robot’s controls and features. The app also provides additional settings and customization options for a more personalized cleaning experience.

Using the iRobot HOME App for Control and Scheduling

The iRobot HOME app is your central hub for controlling and managing your Roomba 960. After downloading and installing the app on your smartphone or tablet, you’ll need to create an account and connect your Roomba 960 to your home Wi-Fi network. The app guides you through this process step-by-step, making it straightforward even for first-time users. Once connected, the app provides a real-time view of your Roomba’s status, including its battery level, cleaning progress, and any error messages. You can initiate cleaning cycles directly from the app, choosing between different cleaning modes like “Clean,” “Spot Clean,” or scheduling a cleaning for a specific time and day.

Scheduling is particularly useful for maintaining a consistently clean home. Set recurring cleaning schedules to suit your routine – whether it’s a daily quick clean or a more thorough weekly cleaning. The app also allows you to create virtual boundaries, known as “Keep Out Zones,” to prevent your Roomba from entering certain areas of your home, such as delicate rugs or high-traffic zones. This ensures that your Roomba cleans only the designated areas. The app also provides a cleaning history, allowing you to review past cleaning sessions and track the performance of your Roomba 960. You can check the total area cleaned, the duration of the cleaning, and even view a map of the cleaned area.

Furthermore, the iRobot HOME app offers access to software updates and firmware upgrades, ensuring that your Roomba 960 operates with the latest features and improved performance. The app also provides helpful troubleshooting tips and allows you to contact iRobot customer support directly if you encounter any problems. Effective use of the iRobot HOME app significantly enhances the functionality and convenience of owning a Roomba 960.

Maintaining Your Roomba 960⁚ Cleaning and Maintenance

Regular cleaning and maintenance are crucial for keeping your Roomba 960 performing at its best. Empty the dustbin after each cleaning cycle to prevent dust and debris buildup, impacting suction power and overall cleaning efficiency. The dustbin is easily accessible and empties quickly. Clean the filters regularly, ideally after every two to three cleaning cycles, or more frequently in homes with pets or those prone to shedding. Dirty filters restrict airflow, reducing suction effectiveness. Rinse the filters under cool running water and allow them to completely air dry before reinstalling. Do not use soap or detergents.

The side brushes and the front caster wheel are also important components that require periodic cleaning. Remove any tangled hair or debris from the side brushes using scissors or a small tool. The front caster wheel can be removed and cleaned to ensure smooth navigation. The cleaning process is simple and described in detail within the included instructions. Additionally, inspect the brushes for any signs of wear and tear, and replace them as needed for optimal performance. The Roomba 960’s brushes are designed to withstand regular use, but replacing them periodically will ensure consistently thorough cleaning. Regular maintenance keeps your Roomba running smoothly and prolongs its lifespan. Refer to the detailed diagrams in the printed manual for a clear visual guide on cleaning and replacing parts.

Remember, consistent maintenance will not only improve cleaning performance but will also extend the life of your Roomba 960. By following these simple steps, you can ensure your robotic vacuum cleaner continues to provide efficient and thorough cleaning for years to come. Regular maintenance also helps prevent potential issues and extends the life of the battery, a crucial component for effective operation.

Troubleshooting Common Issues and Error Codes

Encountering problems with your Roomba 960? This section helps you diagnose and resolve common issues. If your Roomba isn’t starting, check the battery level and ensure it’s properly charged. A low battery will prevent the cleaning cycle from commencing. If the charging indicator light remains off, check the power connection and ensure the home base is securely plugged in. A faulty connection can also inhibit charging. If your Roomba gets stuck, check for obstructions in its path like cords, rugs, or furniture legs. Clear any obstacles to allow for uninterrupted movement. Is the Roomba not cleaning effectively? Check the brushes and the dustbin for blockages. Clogged brushes reduce cleaning power, while a full dustbin prevents further collection of debris.

Error codes displayed on your Roomba 960 provide additional diagnostic information. Consult the detailed troubleshooting section in your manual for explanations of specific codes and their corresponding solutions. For instance, a particular code might indicate a sensor issue, requiring a clean or reset. Another might point towards a mechanical problem, such as a brush malfunctioning. Understanding these codes helps you pinpoint the problem and resolve it quickly, restoring your Roomba to optimal functionality. If you encounter error codes that are not explicitly explained in the manual, consider contacting iRobot support for further assistance. Their customer service team can assist you with more complex issues and provide guidance based on the specific error codes displayed.

Remember to always consult the complete troubleshooting section in your Roomba 960 manual for detailed solutions to common issues and explanations of error codes. This manual provides a comprehensive guide for resolving most issues independently. If problems persist, contact iRobot customer support for expert help.

Advanced Features and Customization Options

Beyond basic cleaning, your Roomba 960 offers advanced features for a personalized cleaning experience. Utilize the iRobot HOME app to define virtual walls and no-go zones, preventing your Roomba from entering specific areas of your home. This is particularly useful for protecting fragile items or keeping your robot vacuum out of certain rooms. Adjust cleaning preferences through the app, selecting specific cleaning modes for different areas or surfaces. Customize cleaning schedules to match your routine, scheduling cleaning sessions daily, weekly, or at specific times that suit your needs. The Roomba 960’s navigation system allows for efficient and comprehensive coverage of your floors, ensuring thorough cleaning with minimal overlap.

Explore the app’s settings to further refine your Roomba’s performance. Adjust suction power for different floor types and cleaning needs. Higher suction is ideal for carpets and high-traffic areas, while a lower setting might be suitable for delicate surfaces like hardwood floors. Experiment with different cleaning modes to find the optimal setting for your home environment. The app also allows you to monitor cleaning progress in real-time, and receive notifications about cleaning completion or any issues encountered during operation. This level of control allows you to maintain a clean home efficiently and conveniently, tailored precisely to your preferences and the specific requirements of your household.

Remember to regularly check the app for software updates to take full advantage of the latest features and improvements. These updates often include performance enhancements and bug fixes, ensuring your Roomba continues to perform optimally. By understanding and utilizing these advanced features and customization options, you can maximize the efficiency and effectiveness of your Roomba 960.

al anon service manual

Al-Anon/Alateen Service Manual⁚ A Comprehensive Overview

The Al-Anon/Alateen Service Manual is a vital resource for members and groups, offering guidance on fellowship operations, policies, and the Twelve Concepts of Service. It’s an essential reference book, updated regularly to reflect current practices and procedures within the Al-Anon/Alateen fellowship.

What is the Al-Anon/Alateen Service Manual?

The Al-Anon/Alateen Service Manual serves as a comprehensive guide and reference book for members and groups within the Al-Anon and Alateen fellowships. It’s not just a collection of rules; it’s a dynamic tool designed to support understanding, growth, and effective functioning within the organization. This indispensable resource provides a detailed overview of Al-Anon and Alateen’s operational structure, clarifying roles, responsibilities, and procedures. The manual acts as a central repository for vital information, ensuring consistency and adherence to established principles across all groups. It’s a valuable tool for both seasoned members seeking a deeper understanding and newcomers navigating the fellowship for the first time. Regularly updated to reflect evolving needs and practices, the manual ensures that groups operate efficiently and remain aligned with the core values of Al-Anon and Alateen. Its accessibility fosters a shared understanding, promoting collaboration and unity among members and facilitating the smooth running of meetings and group activities. The manual plays a crucial role in sustaining the integrity and effectiveness of the fellowship’s overall mission.

Key Contents of the Manual

The Al-Anon/Alateen Service Manual encompasses a wide range of essential information crucial for the effective functioning of groups and the overall well-being of members. Key components include detailed explanations of Al-Anon and Alateen’s operational structure, outlining the roles and responsibilities of various positions within the groups. A digest of Al-Anon and Alateen policies provides a clear understanding of the guiding principles and regulations that govern the fellowship. The manual also includes a comprehensive overview of the World Service structure and the Twelve Concepts of Service, illustrating how these concepts are applied in practice. Furthermore, it offers practical guidance on conducting meetings, facilitating discussions, and managing group dynamics. Included are suggestions for resolving conflicts and maintaining unity within the group, promoting a supportive and harmonious environment. The manual also provides access to supplementary resources and guidelines, helping members find additional support and information. This wealth of information equips members with the tools they need to actively participate in and contribute meaningfully to the Al-Anon/Alateen community.

The 2022-2025 Edition⁚ Updates and Changes

The 2022-2025 edition of the Al-Anon/Alateen Service Manual supersedes all previous versions, incorporating updates and revisions to reflect the evolving needs and practices within the fellowship. These changes often stem from procedural adjustments made by the World Service Office or resolutions passed at Al-Anon/Alateen conferences. The updates may involve modifications to existing sections, clarifying policies or procedures, or adding new information to address emerging issues or best practices. The aim is to ensure the manual remains a current and relevant guide for members and groups. While the core principles and values of Al-Anon/Alateen remain consistent, the operational aspects and administrative processes may necessitate periodic revisions. Access to the most recent version is crucial for maintaining consistency in group operations and adherence to the fellowship’s guidelines. The availability of both print and electronic versions ensures accessibility for all members, regardless of their location or preferences. The online version allows for easy updates and ensures that members always have access to the latest information.

Accessibility and Distribution of the Manual

The Al-Anon/Alateen Service Manual prioritizes accessibility for all members. The World Service Office ensures that every registered Al-Anon and Alateen group receives a physical copy, recognizing its importance as a foundational resource. Beyond this direct distribution, the manual is also made available electronically, allowing for broader access and immediate updates. This digital format eliminates geographical barriers and provides a convenient resource for members who prefer online access. Furthermore, the manual is available for purchase in both print and digital forms from the official Al-Anon literature store, ensuring that individuals can obtain a personal copy if needed. The availability in multiple formats caters to diverse learning styles and technological capabilities, ensuring that the information contained within reaches the widest possible audience. The commitment to accessibility extends beyond mere distribution; the content itself is written for clarity and ease of understanding, promoting inclusivity and fostering a supportive environment for all members.

How to Obtain a Copy

Acquiring a copy of the Al-Anon/Alateen Service Manual is straightforward. Registered Al-Anon and Alateen groups automatically receive a copy from the World Service Office, ensuring readily available access for those actively involved in meetings. For individuals seeking a personal copy, the most reliable method is through the official Al-Anon literature store. This online store offers both print and digital versions, catering to individual preferences. The digital version provides immediate access and the convenience of searchability, while the print version offers a tangible resource for study and reference. Purchasing through official channels supports the Al-Anon Family Groups and ensures you receive the most up-to-date edition. Additionally, some local groups might offer copies for purchase or loan, providing another potential avenue for acquiring the manual. It’s crucial to acquire the manual from legitimate sources to guarantee accuracy and support the organization’s mission. Inquiring with your local group or visiting the online store provides the most reliable way to obtain a copy.

Utilizing the Service Manual

The Al-Anon/Alateen Service Manual serves as a comprehensive guide, aiding members in understanding program principles, fostering group unity, and enhancing service and recovery through consistent study and application.

Practical Applications for Members

The Al-Anon/Alateen Service Manual offers numerous practical applications for members navigating the complexities of the program and their personal journeys. It provides a clear understanding of Al-Anon’s structure and functions, clarifying roles and responsibilities within groups. Members can utilize the manual to resolve internal conflicts, fostering a sense of unity and collaboration. The detailed explanation of Al-Anon’s Twelve Concepts of Service empowers members to actively participate and contribute meaningfully to their groups. The manual’s accessibility ensures that members at all levels of experience can readily find answers to their questions and gain a deeper understanding of the program’s principles. This practical resource guides members in applying the program’s principles to their daily lives, fostering personal growth and recovery.

Furthermore, the Service Manual helps members understand the intricacies of group dynamics and effective communication within the Al-Anon/Alateen fellowship. It serves as a valuable tool for those seeking to enhance their service contributions and deepen their involvement in the community. The readily available information empowers members to confidently address issues, navigate challenges, and contribute to a positive and supportive group environment. By providing a clear framework for understanding Al-Anon’s operations, the manual helps individual members feel more connected to the wider fellowship and more empowered to actively participate in their recovery.

Enhancing Service and Recovery Through Study

Consistent study of the Al-Anon/Alateen Service Manual significantly enhances both service and personal recovery. The manual provides a comprehensive understanding of Al-Anon’s principles, fostering a deeper connection to the fellowship and its mission. By familiarizing oneself with the Twelve Concepts of Service, members gain valuable insights into effective group functioning and collaboration. This knowledge empowers them to contribute more meaningfully to their groups, enriching the experience for themselves and others. The manual’s detailed explanations of policies and procedures promote clarity and efficiency, streamlining group operations and fostering a more cohesive environment.

Moreover, studying the manual promotes personal growth and recovery by providing a framework for self-reflection and understanding. The concepts and principles outlined within the manual offer valuable tools for navigating challenges and fostering personal transformation. Members can utilize the manual as a guide for self-assessment, identifying areas for growth and improvement in their own recovery journey. This process of self-discovery, facilitated by the manual’s content, is instrumental in deepening one’s understanding of the program and its potential for positive change. The ongoing study of the Service Manual fosters a continuous cycle of learning and self-improvement, strengthening both individual recovery and service contributions to the Al-Anon/Alateen community.

Resolving Group Issues and Maintaining Unity

The Al-Anon/Alateen Service Manual serves as an invaluable guide for navigating and resolving group issues, thereby promoting unity and harmony within the fellowship. Its detailed explanation of Al-Anon and Alateen policies provides a clear framework for addressing conflicts and misunderstandings that may arise. By consulting the manual, members can gain a deeper understanding of established procedures and guidelines, facilitating more effective communication and conflict resolution. The manual emphasizes the importance of adhering to established protocols, ensuring fairness and consistency in decision-making processes.

Furthermore, the manual’s emphasis on the Twelve Concepts of Service offers practical strategies for fostering unity and collaboration within the group. The principles of trust, responsibility, and cooperation, as outlined in the manual, provide a foundation for building strong, supportive relationships among members. By adhering to these principles, groups can create a more inclusive and welcoming environment for all participants. The manual’s comprehensive approach to group dynamics and decision-making equips members with the knowledge and tools needed to address challenges proactively, fostering a sense of shared purpose and collective responsibility in maintaining a cohesive and harmonious group environment.

The Manual’s Structure and Content

The Al-Anon/Alateen Service Manual provides a structured guide to the fellowship’s operations, encompassing policies, the World Service Handbook, and the Twelve Concepts of Service, ensuring clarity and consistency.

Al-Anon and Alateen Groups at Work

This section of the Al-Anon/Alateen Service Manual delves into the practical aspects of running effective and supportive meetings. It provides detailed guidance on various meeting formats, offering examples and suggestions to ensure a consistent and productive environment for members. The manual emphasizes the importance of creating a welcoming atmosphere conducive to sharing experiences and fostering mutual support. Detailed instructions on meeting procedures are provided, including how to conduct elections, manage finances, and maintain appropriate communication protocols. Furthermore, it emphasizes the importance of adhering to Al-Anon/Alateen traditions and principles, preserving the integrity and effectiveness of the group’s operations. The section also covers practical advice on addressing challenges that may arise within a group setting, such as conflicts or disagreements, promoting unity and collaboration among members. It also offers insights into effective group leadership, encouraging participation and empowerment within the group. By providing clear guidelines and practical examples, this section empowers groups to function smoothly and effectively, achieving their goals of providing support and recovery to members. The importance of maintaining a confidential and safe environment is consistently stressed throughout the section, highlighting the sensitivity required in handling personal information and experiences.

Digest of Al-Anon and Alateen Policies

The “Digest of Al-Anon and Alateen Policies” section within the Service Manual serves as a concise yet comprehensive guide to the operational guidelines of the fellowship. It outlines the established rules and procedures that govern the functioning of Al-Anon and Alateen groups worldwide, ensuring consistency and adherence to the core principles of the program. This section clarifies topics such as group registration, financial management, and the ethical handling of sensitive information. It provides clear instructions on how groups should handle funds, maintain accurate records, and conduct transparent financial reporting. Furthermore, the digest addresses issues related to member confidentiality, emphasizing the importance of protecting the privacy of individuals sharing personal experiences within the group. It also details the processes for addressing complaints or concerns that may arise within a group or between groups, ensuring fairness and due process for all involved. The section emphasizes the importance of maintaining the anonymity of members while promoting responsible communication and collaboration between groups. The policies outlined in this section aim to promote the smooth operation and long-term sustainability of Al-Anon and Alateen groups, while upholding the ethical and spiritual foundations of the fellowship. It’s a crucial resource for all members and group leaders, ensuring a consistent and supportive environment for all.

World Service Handbook and Twelve Concepts of Service

The Al-Anon/Alateen Service Manual dedicates a significant portion to explaining the “World Service Handbook” and the “Twelve Concepts of Service.” This section provides a detailed understanding of the organizational structure and guiding principles that govern the global operation of Al-Anon and Alateen. The World Service Handbook outlines the framework for how the fellowship operates at a global level, from its international structure to its regional and local branches. It details the responsibilities and functions of various service bodies, ensuring efficient coordination and support for groups worldwide. The Twelve Concepts of Service are integral to this section. They serve as a philosophical compass, guiding the actions and decisions of all those involved in providing service to the fellowship. These concepts emphasize principles of unity, responsibility, and spiritual growth, ensuring that service efforts remain aligned with the core values of Al-Anon and Alateen. The section clarifies the interconnectedness of these concepts, emphasizing their importance in maintaining a healthy and effective service structure. Through careful explanation and illustrative examples, the manual assists members in applying these concepts to their own service roles, whether within their local group or at a broader level. Understanding these concepts is crucial for anyone involved in leading or supporting Al-Anon and Alateen groups.

Additional Resources and Guidelines

Beyond the core components, the Al-Anon/Alateen Service Manual includes a valuable collection of additional resources and guidelines designed to support members and groups in their efforts. This section often features supplementary materials that provide further clarification on specific topics or offer practical advice for handling various situations. It might include templates for meeting agendas, suggestions for effective communication within groups, or examples of successful approaches to problem-solving. These resources are often presented in a user-friendly format, making them easily accessible and applicable to diverse group contexts. The inclusion of these supplementary materials enhances the manual’s practical value, transforming it from a purely informational guide into a comprehensive toolkit for navigating the complexities of group dynamics and service provision. The additional guidelines might also address specific challenges or frequently asked questions, offering readily available solutions to common issues faced by Al-Anon and Alateen groups. By providing these extra resources, the manual empowers members to handle various situations effectively and efficiently, fostering a supportive and productive environment for both members and groups. The aim is to equip members with the tools needed to enhance their service experience and contribute effectively to the growth and success of the fellowship.

mini sewing machine manual pdf

Mini Sewing Machine Manual PDF: A Comprehensive Guide

Welcome! This comprehensive guide provides an overview of mini sewing machine manuals available in PDF format․ Whether you own an Easy Home MS-201, Sunbeam SB08, or another model, understanding your manual is key․ This guide will help you navigate common topics like threading, bobbin winding, and troubleshooting․

Understanding Your Mini Sewing Machine

Before diving into specific tasks, it’s crucial to understand the fundamentals of your mini sewing machine․ These compact machines, like the Easy Home Mini Sewing Machine MS-201, are designed for basic sewing tasks and portability․ Familiarize yourself with its various components, such as the needle, bobbin case, thread spindle, and foot pedal or speed switch, which are labeled in most manuals․

Understanding how each part functions is essential for smooth operation․ For example, knowing the direction of bobbin winding, as specified in manuals like the SewMighty operation manual, prevents thread jams․ Remember that mini sewing machines are often dual-speed, offering flexibility for different projects․ Always refer to your machine’s manual, like the Singer FHSM-505 manual, for model-specific instructions on threading, stitch patterns, and safety precautions․ Understanding these basics ensures you can confidently tackle any sewing project․

The manuals also often provide diagrams labeling the parts and accessories of the machine․ The better you understand the sewing machine, the easier it will be to operate!

Key Features and Specifications

Delving into the key features and specifications of your mini sewing machine is paramount for maximizing its potential․ Most manuals, including those for models like the Magicfly Dual Speed Mini Portable Sewing Machine, outline essential features․ These often include dual-speed operation, allowing for varied stitching paces, and built-in lights to illuminate the sewing area․

Power options, such as AC/DC adapters or battery operation, contribute to portability․ Specifications typically cover dimensions, weight, and the range of compatible fabrics․ Furthermore, manuals detail available stitch patterns and tension adjustments․ Understanding these aspects ensures you select appropriate settings for different projects․ Manuals like the Janome 525A Sew Mini instruction manual, highlight specific features tailored to that model․

Knowing the machine’s limitations, such as fabric thickness, prevents damage and ensures optimal performance․ Always consult the specifications section in your manual to fully grasp your machine’s capabilities and any limitations that may exist․ It’s also a good idea to keep the manual in a safe place․

Threading the Machine: A Step-by-Step Guide

Threading a mini sewing machine can seem daunting, but manuals provide clear, step-by-step instructions․ First, ensure the machine is powered off and the needle is in its highest position by turning the handwheel․ Locate the thread spindle and place your thread spool securely on it; Next, guide the thread through the designated thread guides, following the numbered diagram in your manual, often found in models like the Singer FHSM-505․

Pay close attention to tension discs, ensuring the thread is properly seated between them․ Proceed to thread the needle, typically from back to front, leaving a few inches of thread extending through the eye․ Many manuals emphasize pulling at least 2 inches of thread through the needle before starting․

Double-check that the thread moves freely and is correctly positioned within all guides․ Mistakes in threading can lead to skipped stitches or tangled thread․ Refer to your specific manual for diagrams illustrating the precise threading path for your machine model․

Bobbin Winding and Insertion

Bobbin winding and insertion are crucial steps in preparing your mini sewing machine; Consult your manual for specific instructions tailored to your machine model, such as the Easy Home Mini Sewing Machine MS-201․ Begin by placing an empty bobbin on the bobbin winding spindle․ Engage the bobbin winding mechanism, often by pushing the bobbin to the right․

Follow the threading diagram in your manual to guide the thread from the spool, through the tension disc for bobbin winding, and onto the bobbin itself․ Start the machine, either using the foot pedal or the speed switch, to wind the thread evenly onto the bobbin․ Many manuals advise holding the thread lightly during this process to ensure smooth winding, as mentioned in the SewMighty manual․

Once the bobbin is full, disengage the winding mechanism and carefully remove the bobbin․ Next, insert the bobbin into the bobbin case, ensuring it rotates in the correct direction as indicated in your manual․ This direction is usually anti-clockwise․ Secure the bobbin case in the machine according to your manual’s instructions, ensuring it clicks into place․ Improper bobbin insertion can cause significant sewing issues․

Operating the Machine: Foot Pedal vs․ Speed Switch

Mini sewing machines often offer two methods of operation: a foot pedal and a speed switch․ Understanding the differences is essential for controlling your sewing speed and achieving desired results․ The foot pedal provides variable speed control, allowing you to adjust the sewing speed based on the pressure applied․ Pressing down gently results in slower stitching, ideal for intricate work or navigating curves․

Conversely, applying more pressure increases the speed, suitable for straight seams and faster completion of projects․ Releasing the foot pedal immediately stops the machine․ The speed switch, on the other hand, offers a constant speed setting․ Typically, mini sewing machines have low and high-speed settings․ The low-speed setting is useful for beginners or when precision is needed, while the high-speed setting allows for quicker sewing on simpler tasks․

Engaging the speed switch provides continuous operation without needing to keep your foot on the pedal, which can be beneficial for longer seams․ However, it also means less immediate control over stopping the machine․ Refer to your specific manual, such as the FHSM-505 model manual, for precise instructions on locating and using the foot pedal and speed switch on your machine․ Experiment with both methods to determine which you prefer for different sewing tasks․

Basic Sewing Techniques

Mastering basic sewing techniques is crucial for successful projects with your mini sewing machine․ Start with understanding the straight stitch, the foundation of most sewing projects․ Ensure your machine is properly threaded and the fabric is aligned before beginning․ Maintain a consistent seam allowance by using the edge of the presser foot as a guide․ Practice sewing straight lines on scrap fabric to develop control․

Next, explore turning corners․ Stop the machine with the needle down in the fabric, lift the presser foot, rotate the fabric to the new direction, lower the presser foot, and continue sewing․ This technique is essential for creating clean corners in your projects․ Another important technique is backstitching, used to secure the beginning and end of a seam․ Sew a few stitches forward, then reverse the stitch direction for a few stitches, and then continue sewing forward․

This prevents the seam from unraveling․ Familiarize yourself with different seam finishes to prevent fraying․ Simple options include zigzag stitching along the raw edge or using seam binding․ Always refer to your machine’s manual for specific instructions and recommended settings for different fabric types․ Practice these basic techniques to build confidence and create well-crafted sewing projects with your mini sewing machine․

Troubleshooting Common Issues

Mini sewing machines, while convenient, can sometimes present challenges․ One common issue is thread breakage․ This often stems from incorrect threading, improper tension settings, or using low-quality thread․ Ensure the machine is threaded correctly, following your manual’s instructions meticulously․ Adjust the tension dial slightly and test on scrap fabric until the stitches are balanced․ Try a different brand of thread, as some are more prone to breakage․

Another frequent problem is skipped stitches․ This can result from a bent or damaged needle, incorrect needle size for the fabric, or improper timing․ Replace the needle with a new one of the appropriate size․ Clean the bobbin area to remove any lint or debris that may be interfering with the stitch formation․ If the issue persists, consult your manual for timing adjustment instructions or seek professional repair․

Fabric bunching or jamming is another common frustration․ This usually occurs due to incorrect fabric feeding or using too thick of a fabric for the machine’s capabilities․ Ensure the feed dogs are properly engaged and not obstructed․ Use a walking foot for thick fabrics to help feed the material evenly․ Clean the feed dogs regularly to remove lint and debris․ Always test on a scrap of the same fabric before starting your project to avoid these issues․

Maintenance and Care

Proper maintenance is crucial for extending the life of your mini sewing machine․ Regular cleaning prevents lint and dust buildup, which can hinder performance․ Use a small brush or vacuum attachment to remove debris from the bobbin area, feed dogs, and needle plate․ Oiling is also essential for smooth operation․ Refer to your manual for specific oiling points and the recommended type of sewing machine oil․ Avoid using household oils, as they can damage the machine․

After each use, cover your machine to protect it from dust and sunlight․ Store it in a cool, dry place to prevent rust and corrosion․ Periodically check the needle for sharpness and replace it when needed․ A dull needle can damage fabric and cause skipped stitches․ Inspect the power cord and foot pedal for any signs of wear or damage․ If you notice any issues, have them repaired by a qualified technician․

For machines with electronic components, avoid exposing them to excessive moisture or extreme temperatures․ If you plan to store your machine for an extended period, consider removing the needle and foot pedal․ By following these simple maintenance tips, you can keep your mini sewing machine in optimal condition and enjoy years of reliable use․ Always consult your manual for specific maintenance instructions tailored to your machine model․

Available Manuals and Resources (PDF Downloads)

Finding the right manual for your mini sewing machine can be a breeze with numerous resources available online․ Many manufacturers offer PDF downloads of their manuals directly on their websites․ Start by visiting the official website of your sewing machine brand, such as Easy Home, Sunbeam, or Singer․ Look for a “Support” or “Downloads” section, where you can typically find manuals by model number․

If you’re unable to find the manual on the manufacturer’s website, try searching online using the model number and “manual PDF․” Several websites specialize in hosting user manuals for various appliances and devices․ Be cautious when downloading from third-party websites and ensure they are reputable to avoid malware or viruses․

In addition to manuals, consider exploring online forums and communities dedicated to sewing․ These platforms often have shared resources, troubleshooting tips, and helpful advice from experienced users․ YouTube tutorials can also be valuable for visual learners, providing step-by-step instructions on specific tasks like threading or bobbin winding․ Remember to always prioritize safety and consult your manual for the most accurate and reliable information regarding your mini sewing machine․

bosch 500 series washer manual

Bosch 500 Series Washer Manual⁚ A Comprehensive Guide

This comprehensive guide is your one-stop resource for everything you need to know about your Bosch 500 Series washer․ From key features and specifications to troubleshooting common issues and cleaning and maintenance tips‚ we cover it all․

Whether you’re a first-time Bosch user or simply need a refresher‚ this manual will help you get the most out of your appliance․

We’ve also included a section on warranty information‚ where to find the manual‚ and frequently asked questions to help you navigate any questions or concerns you may have․

Read on and discover the world of Bosch 500 Series washing excellence!

Introduction

Welcome to the world of Bosch 500 Series washers‚ where innovation meets efficiency and reliability․ This manual serves as your comprehensive guide to understanding and operating your new appliance․

The Bosch 500 Series is renowned for its advanced features‚ designed to deliver exceptional cleaning performance and gentle care for your delicate garments․

This manual is designed to provide you with all the necessary information to get the most out of your Bosch 500 Series washer․ It covers everything from installation and setup to operating instructions‚ troubleshooting common issues‚ and proper cleaning and maintenance․

By reading through this manual‚ you’ll gain a thorough understanding of your appliance’s capabilities and how to maximize its performance for years to come․ We encourage you to take your time and familiarize yourself with the information provided to ensure a smooth and enjoyable laundry experience․

Let’s dive into the world of Bosch 500 Series washers!

Key Features and Specifications

The Bosch 500 Series washers boast a range of innovative features designed to elevate your laundry experience․ Here are some of the key highlights⁚

  • High-Efficiency Performance⁚ Bosch 500 Series washers are engineered for energy efficiency‚ saving you money on your utility bills․
  • Precise Wash Cycles⁚ With a variety of wash cycles tailored to different fabric types and levels of soiling‚ you can achieve the perfect clean every time․
  • Gentle Fabric Care⁚ Bosch 500 Series washers use advanced technology to protect your delicate garments‚ ensuring they come out looking their best․
  • Quiet Operation⁚ Experience peace and quiet during your laundry cycle with Bosch 500 Series washers’ advanced noise reduction technology․
  • Easy-to-Use Controls⁚ Intuitive controls and a user-friendly interface make operating your Bosch 500 Series washer a breeze․
  • Large Capacity⁚ With ample capacity‚ you can handle even the largest laundry loads with ease․
  • Durable Construction⁚ Bosch 500 Series washers are built to last‚ ensuring reliable performance for years to come;

Specific features and specifications may vary depending on the model․ Refer to your user manual for detailed information regarding your particular Bosch 500 Series washer․

Installation and Setup

Installing your Bosch 500 Series washer correctly ensures optimal performance and longevity․ Follow these steps for a smooth and successful installation⁚

  1. Choose the Right Location⁚ Select a level‚ sturdy surface capable of supporting the weight of the washer․ Ensure adequate clearance for opening the door and accessing the controls․
  2. Unpack and Inspect⁚ Carefully unpack your Bosch 500 Series washer‚ noting any damage or missing parts․ Inspect the washer for any defects or imperfections․
  3. Connect the Water Supply⁚ Use the provided hoses to connect the washer to your cold water supply line․ Ensure the connections are secure and leak-free․
  4. Connect the Drain Hose⁚ Attach the drain hose to the washer and secure it to the drain pipe or a designated drain location․ The drain hose must be properly secured to prevent leaks and ensure proper drainage․
  5. Electrical Connection⁚ Connect the washer to a properly grounded electrical outlet․ Use the provided power cord and ensure the voltage matches the specifications outlined in your user manual․
  6. Level the Washer⁚ Adjust the leveling legs until the washer is perfectly level․ Unevenness can cause vibrations and damage to the appliance․
  7. Run a Test Cycle⁚ After completing the installation‚ run a test cycle with no laundry to ensure everything is working properly․ Check for leaks‚ unusual noises‚ or any other irregularities․

Refer to your Bosch 500 Series washer user manual for detailed installation instructions and diagrams specific to your model․ It’s essential to follow the manufacturer’s guidelines to ensure safe and proper setup․

Operating Instructions

Operating your Bosch 500 Series washer is a breeze․ Here’s a step-by-step guide to help you navigate the features and achieve sparkling clean laundry⁚

  1. Load the Washer⁚ Open the door and load your laundry‚ ensuring you don’t overload the washer․ Refer to the capacity guidelines in your user manual․
  2. Select the Wash Cycle⁚ Choose the appropriate wash cycle based on the type of laundry and its level of soiling․ Bosch 500 Series washers offer a variety of cycles‚ including delicate‚ cotton‚ synthetics‚ and more․
  3. Set the Water Level⁚ Adjust the water level according to the load size․ The washer automatically adjusts water usage for optimal efficiency․
  4. Add Detergent and Fabric Softener⁚ Dispense the recommended amount of detergent and fabric softener into the designated compartments․ Refer to the detergent and softener guidelines provided in your user manual․
  5. Close the Door⁚ Ensure the door is securely closed․
  6. Start the Cycle⁚ Press the start button to begin the wash cycle․ The washer will automatically progress through the chosen cycle․
  7. Monitor Progress⁚ The washer’s display will show the remaining cycle time and other relevant information․
  8. Transfer Laundry⁚ Once the cycle is complete‚ transfer the laundry to the dryer or hang it to dry․

Remember to always check the care labels on your clothing for specific washing instructions․ For detailed information on each wash cycle‚ refer to your Bosch 500 Series washer user manual․

Troubleshooting Common Issues

While Bosch 500 Series washers are known for their reliability‚ occasional issues can arise․ Here’s a guide to address common problems and their potential solutions⁚

  • Washer Won’t Start⁚ Check if the power cord is plugged in and if the outlet is working․ Ensure the door is securely closed․ If the issue persists‚ consult your user manual or contact Bosch customer support․
  • Water Doesn’t Drain⁚ Ensure the drain hose is properly connected and not kinked or blocked․ Check the drain pump filter for any obstructions․ If the problem continues‚ a professional technician may be needed․
  • Washer Makes Unusual Noises⁚ If the washer is making unusual noises‚ such as banging or grinding‚ it could indicate a problem with the drum‚ bearings‚ or other components․ Consult your user manual or contact Bosch customer support for assistance․
  • Washer Leaking⁚ Check the water supply hoses for leaks or damage․ Ensure the washer is properly leveled to prevent leaks․ If the leak persists‚ contact Bosch customer support for professional repair․
  • Error Codes⁚ Bosch 500 Series washers display error codes on their control panel to indicate specific issues․ Consult your user manual for a list of error codes and their corresponding solutions․ If you can’t resolve the problem‚ contact Bosch customer support․

This information is intended as a basic troubleshooting guide․ For more detailed information and potential solutions‚ refer to your Bosch 500 Series washer user manual․ If the problem persists or you are unsure about a solution‚ contact Bosch customer support for professional assistance․

Cleaning and Maintenance

Regular cleaning and maintenance are essential for keeping your Bosch 500 Series washer performing at its best․ Here’s a guide to help you maintain your appliance⁚

  • Clean the Dispenser Drawer⁚ Regularly clean the dispenser drawer to remove detergent residue and prevent clogs․ Remove the drawer and wash it with warm‚ soapy water․ Rinse thoroughly and dry before reinserting it․
  • Clean the Drum⁚ Wipe down the inside of the drum with a damp cloth to remove any lint or debris․ For a deeper clean‚ use a mild detergent solution and a soft brush․
  • Clean the Door Seal⁚ Wipe down the door seal with a damp cloth to remove any dirt or mildew․ Ensure the seal is dry before closing the door․
  • Clean the Drain Pump Filter⁚ The drain pump filter should be cleaned every 3-6 months․ Remove the filter and rinse it under running water․ Replace the filter and ensure it is securely fastened․
  • Clean the Exterior⁚ Wipe down the exterior of the washer with a damp cloth to remove dust and fingerprints․ Avoid using harsh chemicals or abrasive cleaners that could damage the finish․

By following these simple maintenance tips‚ you can extend the life of your Bosch 500 Series washer and ensure it continues to provide efficient and reliable performance for years to come․

Warranty Information

Your Bosch 500 Series washer comes with a comprehensive warranty that covers defects in materials and workmanship․ The specific terms and conditions of your warranty may vary depending on your region and the model of your washer․ However‚ it generally covers⁚

  • Parts and Labor⁚ The warranty typically covers the cost of parts and labor for repairs of any manufacturing defects within a specific time period․
  • Exclusions⁚ The warranty usually excludes coverage for damage caused by misuse‚ negligence‚ or accidents․ It may also exclude coverage for certain parts like the outer cabinet and plastic parts․

To find the specific details of your warranty‚ refer to the warranty booklet that came with your washer․ You can also visit the Bosch website or contact customer service for further information․ It’s important to note that the warranty period may start from the date of purchase or the date of installation․ Be sure to keep your purchase receipt or installation documentation as proof of purchase․

If you experience any problems with your Bosch 500 Series washer during the warranty period‚ contact Bosch customer service immediately․ They will be able to assist you with any warranty claims or repairs․

Where to Find the Manual

Finding the user manual for your Bosch 500 Series washer is easier than you think․ You have several convenient options to access the information you need․

  • Check the Box⁚ The first place to look is the box your washer came in․ Many manufacturers include a physical copy of the user manual within the packaging․
  • Bosch Website⁚ Visit the official Bosch website and navigate to their support or product information section․ You can search for your specific washer model and download the manual in PDF format․
  • Online Manuals Databases⁚ Websites like ManualsOnline provide a vast library of user manuals for various appliances․ You can search for your Bosch 500 Series washer by model number to find the relevant manual․
  • Bosch Customer Service⁚ If you can’t find the manual online‚ contact Bosch customer service․ They can provide you with a digital copy or assist you in locating a physical copy․

By utilizing these resources‚ you can easily obtain the Bosch 500 Series washer manual and access all the information you need to operate‚ maintain‚ and troubleshoot your appliance․ Remember to bookmark the website or save the PDF for future reference․

Frequently Asked Questions

Here are some of the most frequently asked questions about Bosch 500 Series washers‚ along with their answers‚ to help you navigate common concerns and find the information you need⁚

  • Q⁚ Is it normal to see water marks on a brand new Bosch 500 Series washer?
  • A⁚ Yes‚ it’s common for brand new washers to have water marks․ This is because many manufacturers test their appliances before shipping them to ensure proper functionality․ These marks should not affect the performance or functionality of your washer․
  • Q⁚ How do I run the spin cycle manually on my Bosch 500 Series washer?
  • A⁚ While your washer has automatic spin cycles‚ you can manually initiate a spin cycle using diagnostic codes․ To do this‚ follow these steps⁚
    1. Turn the washer selection knob to the OFF position․
    2. Simultaneously press and hold down the Spin Selection and Delay Start buttons․
    3. While holding those two buttons‚ turn the washing selector knob to the desired spin cycle․
  • Q⁚ My Bosch 500 Series washer displays an error code․ What does it mean?
  • A⁚ Error codes provide insights into potential issues with your washer․ Refer to the user manual for a detailed explanation of each error code․ The manual will guide you on troubleshooting steps or recommended repairs․

If you have any other questions or concerns not addressed here‚ consult your Bosch 500 Series washer manual or reach out to Bosch customer support for assistance․

graco 4ever dlx manual pdf

Graco 4Ever DLX Manual⁚ A Comprehensive Guide

The Graco 4Ever DLX is a popular 4-in-1 car seat that can be used from infancy to booster stage. The Graco 4Ever DLX User Manual provides comprehensive instructions for using the Graco 4Ever DLX car seat. Learn how to install, adjust and use this versatile car seat that grows with your child. Download the PDF now for easy access to important safety information and tips on how to get the most out of your Graco 4Ever DLX. The Graco 4Ever DLX SnugLock 4-in-1 Car Seat gives you 10 years of use with one car seat, and features SnugLock technology. The best-selling 4Ever you know and love now installs in less than one minute using vehicle seat belt or LATCH.

Introduction

The Graco 4Ever DLX car seat is a popular choice for parents looking for a versatile and long-lasting car seat. This comprehensive guide, based on the official Graco 4Ever DLX manual, will walk you through everything you need to know about using and maintaining this essential safety product. From installation to adjusting the harness and headrest, we’ll cover all the key aspects to ensure your child’s safety and comfort.

The Graco 4Ever DLX is a 4-in-1 car seat that can be used from infancy to booster stage. It features SnugLock technology for a secure and easy installation, as well as a variety of adjustable features to accommodate your growing child.

This manual will provide you with step-by-step instructions and illustrations to help you navigate all the features of the Graco 4Ever DLX. We’ll also address common issues and answer frequently asked questions to ensure you have a smooth and safe experience with your car seat.

Understanding the Graco 4Ever DLX

The Graco 4Ever DLX is a 4-in-1 car seat designed to grow with your child from infancy to booster stage, offering up to 10 years of use. This versatility eliminates the need to purchase multiple car seats as your child grows, providing both convenience and cost savings.

The Graco 4Ever DLX features SnugLock technology, simplifying installation and ensuring a secure fit. It also includes adjustable features like the harness and headrest, allowing you to customize the seat to perfectly accommodate your child’s size and comfort;

The Graco 4Ever DLX is a popular choice for parents seeking a reliable and safe car seat with a long lifespan. Its 4-in-1 design, SnugLock technology, and adjustable features make it a versatile and user-friendly option that can adapt to your child’s changing needs.

Installation Guide

The Graco 4Ever DLX manual provides detailed instructions on installing the car seat in various modes, ensuring proper safety and fit for your child. It covers rear-facing, forward-facing, and booster seat installations, catering to different stages of your child’s growth.

For each mode, the manual includes step-by-step instructions, diagrams, and illustrations, making the process clear and easy to follow. It emphasizes using both the vehicle seat belt and LATCH system for secure installation, depending on your car’s compatibility.

Additionally, the manual highlights crucial safety considerations, like ensuring the car seat is installed tightly and securely in your vehicle. It also guides you on adjusting the harness and headrest height for optimal fit, ensuring maximum safety and comfort for your child;

Rear-Facing Installation

The Graco 4Ever DLX manual provides comprehensive instructions for installing the car seat in rear-facing mode, which is recommended for infants and toddlers. This section details the steps for both LATCH and seat belt installations, ensuring a secure fit in various vehicles.

The manual clearly illustrates the process of attaching the LATCH connectors to the vehicle’s anchor points and tightening the straps to achieve a secure fit. It also explains how to use the vehicle seat belt for installation, ensuring proper routing and tightness.

The manual also emphasizes the importance of ensuring that the car seat is installed at a 45-degree angle or less, ensuring the child’s head does not slump forward, which could be dangerous in a crash. It also provides guidance on adjusting the harness and headrest height to fit the child properly, ensuring maximum safety and comfort.

Forward-Facing Installation

The Graco 4Ever DLX manual provides detailed instructions for installing the car seat in forward-facing mode, which is suitable for older children who have outgrown the rear-facing stage. The manual guides you through both LATCH and seat belt installations, ensuring a secure fit in various vehicles. It provides clear illustrations and step-by-step instructions for attaching the LATCH connectors to the vehicle’s anchor points and tightening the straps.

It also explains how to use the vehicle seat belt for forward-facing installation, ensuring proper routing and tightness. The manual emphasizes the importance of ensuring that the car seat is installed at a 45-degree angle or less, ensuring the child’s head does not slump forward, which could be dangerous in a crash. It also provides guidance on adjusting the harness and headrest height to fit the child properly, ensuring maximum safety and comfort. The manual also highlights the importance of the “SnugLock” technology, which allows for a secure and easy installation.

Booster Seat Installation

The Graco 4Ever DLX manual includes detailed instructions for installing the car seat as a highback booster seat for older children who have outgrown the harness stage. This stage is suitable for children who are at least 40 pounds and have reached the minimum height requirements. The manual guides you through two installation methods⁚ using the vehicle’s seat belt and the LATCH system. It provides step-by-step instructions for each method, ensuring a secure fit in various vehicles.

The manual emphasizes the importance of using the vehicle’s lap and shoulder belt correctly and ensuring that the booster seat is positioned correctly on the vehicle seat. It also explains how to adjust the booster seat’s height and position to fit the child comfortably and securely. The manual highlights the importance of ensuring that the child’s lap belt fits snugly across their hips, and the shoulder belt fits snugly across their chest and shoulder. The manual also includes illustrations and diagrams to help you understand the installation process better.

Safety Features

The Graco 4Ever DLX manual highlights a comprehensive range of safety features designed to protect your child in various situations. The manual emphasizes the importance of using the car seat according to the weight and height requirements specified for each stage. It outlines features like the 10-position adjustable headrest that provides optimal head support for growing children and ensures the harness straps are positioned at or just above their shoulders. The manual also details the five-point harness system designed to secure your child in a safe and comfortable position.

The manual further emphasizes the importance of using the LATCH system or vehicle seat belts for installation, ensuring a secure fit in various vehicles. It also mentions the SnugLock technology, which allows for a secure installation in less than one minute. The manual also provides information on the impact-absorbing shell and the reinforced frame, which contribute to the car seat’s overall safety. It also emphasizes the importance of inspecting the car seat for any damage or wear before each use.

Adjusting the Harness and Headrest

The Graco 4Ever DLX manual provides detailed instructions on adjusting the harness and headrest to ensure a proper fit for your child. It emphasizes the importance of adjusting these components as your child grows to maintain optimal safety and comfort. The manual explains the process of loosening the harness straps by pressing the red harness release buttons located on the sides of the car seat. It then instructs you to thread the harness straps through the appropriate slots on the headrest, ensuring they are positioned at or just above your child’s shoulders.

The manual emphasizes the importance of tightening the harness straps after adjusting them to ensure a snug fit. It also explains how to adjust the headrest to accommodate your child’s height. The manual clearly outlines the steps involved in raising or lowering the headrest using the buttons located on the sides of the car seat. It also highlights the importance of referring to the manual’s illustrations for visual guidance during the adjustment process.

Cleaning and Maintenance

The Graco 4Ever DLX manual provides comprehensive instructions on cleaning and maintaining the car seat to ensure its longevity and safety. It recommends using a mild detergent and a damp cloth to clean the fabric cover. It stresses the importance of avoiding harsh chemicals, bleach, and abrasive cleaners, as these can damage the material. The manual also advises against using a washing machine or dryer to clean the cover, as this can distort its shape and compromise its safety features.

The manual also offers guidance on cleaning the car seat’s plastic components. It suggests using a mild soap and water solution to clean the plastic surfaces, avoiding any abrasive cleaners or scrubbers. The manual emphasizes the importance of drying the car seat thoroughly after cleaning, ensuring that all parts are completely dry before reassembling and using it. It also reminds users to check the car seat regularly for any signs of wear or damage, and to replace any worn or damaged components immediately.

Troubleshooting Common Issues

The Graco 4Ever DLX manual addresses common issues users might encounter, offering step-by-step troubleshooting guides. One common issue is difficulty installing the car seat. The manual provides detailed instructions for rear-facing, forward-facing, and booster seat installation using both the vehicle’s seat belt and LATCH system. It also explains how to identify and resolve installation errors, such as the car seat moving more than one inch in any direction.

Another frequent concern is harness adjustment. The manual provides clear instructions on adjusting the harness height and straps to ensure a proper and secure fit for the child. It emphasizes the importance of checking the harness regularly for any signs of wear or damage, and replacing it if necessary. The manual also addresses common issues with the car seat’s recline mechanism, cup holders, and other accessories, providing detailed troubleshooting steps for each.

Frequently Asked Questions

The Graco 4Ever DLX manual often includes a dedicated section for frequently asked questions (FAQs) to address common user inquiries. These FAQs cover a wide range of topics, including installation, safety, and maintenance. One common question concerns the proper age and weight limits for each stage of the car seat. The manual clearly outlines the specific weight and height requirements for rear-facing, forward-facing, and booster modes. It also provides guidance on when to transition between stages. Another frequently asked question relates to the infant insert. The manual explains when and how to remove the infant insert as the child grows.

Additionally, parents often inquire about the proper way to clean the car seat. The manual provides detailed cleaning instructions, emphasizing the use of mild soap and water and avoiding harsh chemicals. It also addresses questions about the car seat’s fabric, buckles, and other components, ensuring users have the necessary information to maintain the car seat’s safety and functionality.

Where to Find the Manual

Finding the Graco 4Ever DLX manual is relatively straightforward and accessible. The most convenient way is to access it online through the Graco website. Simply visit gracobaby.com, navigate to the “Car Seat Manuals” section, and locate the specific manual for the 4Ever DLX model. This provides a digital copy of the manual in PDF format, which can be easily downloaded and saved for future reference. Alternatively, you can often find the manual within the packaging of the car seat itself. This allows for immediate access to the instructions upon purchasing the car seat.

Additionally, if you have lost or misplaced the manual, contacting Graco customer service directly is another option. They can provide a digital copy or assist in obtaining a physical copy. Remember that having the manual readily available is crucial for understanding and following the correct installation, usage, and maintenance procedures of the Graco 4Ever DLX.

bosch cooker manual

Bosch Cooker Manuals⁚ A Comprehensive Guide

This comprehensive guide delves into the world of Bosch cooker manuals, providing valuable insights for owners seeking to understand their appliances better. From locating your specific manual to deciphering symbols and troubleshooting common issues, this guide aims to empower you with the knowledge needed to maximize your Bosch cooker’s performance and longevity.

Introduction

In the modern kitchen, a Bosch cooker stands as a testament to innovation and culinary excellence. These appliances are renowned for their robust construction, advanced features, and intuitive design. However, unlocking the full potential of a Bosch cooker requires more than just a flick of the switch; it demands a thorough understanding of its inner workings and capabilities. This is where the Bosch cooker manual comes into play, serving as your indispensable companion for navigating the complexities of your appliance and ensuring optimal performance.

The Bosch cooker manual is not merely a collection of instructions but rather a comprehensive guide that empowers you to master your appliance. It provides detailed information on installation, operation, maintenance, and troubleshooting, enabling you to confidently address any challenges that may arise. From understanding the intricacies of different cooking modes and settings to deciphering cryptic symbols and resolving minor malfunctions, the manual equips you with the knowledge needed to make the most of your Bosch cooker.

Finding Your Bosch Cooker Manual

Locating your Bosch cooker manual is the first step towards mastering your appliance. The manual is typically included with your cooker upon purchase, but if you’ve misplaced it, there are several avenues to retrieve a digital copy. The most straightforward method is to utilize Bosch’s online resources. Visit the official Bosch website and navigate to their “Support” or “Manuals” section. You’ll often find a search function where you can enter your cooker’s model number (E-Nr) to access a downloadable PDF version of the manual.

If the official website doesn’t yield results, consider exploring online platforms like ManualsLib. This website houses a vast database of user manuals for various appliances, including Bosch cookers. Simply search for your cooker’s model number and browse the available options. Keep in mind that manuals might be available in different languages, so select the English version for clarity. Should you encounter difficulties finding your manual online, contact Bosch customer support directly. They can assist you in locating the appropriate document or guide you through alternative options.

Bosch Cooker Manual Features

Bosch cooker manuals are more than just a collection of instructions; they are comprehensive guides designed to enhance your cooking experience. These manuals provide detailed information about your specific cooker model, ensuring you utilize its features effectively and safely. You can expect to find a wealth of information, including detailed descriptions of each cooking function, temperature settings, and recommended cooking times for various dishes. The manual often includes illustrations and diagrams to clarify instructions and make navigating the appliance easier.

Beyond basic operation, Bosch cooker manuals often delve into advanced features, such as specific cooking techniques, tips for optimizing energy efficiency, and troubleshooting common issues. You might also find information on cleaning and maintenance procedures, ensuring your cooker remains in optimal condition for years to come. The manual serves as a valuable resource, helping you understand your Bosch cooker’s capabilities and maximizing its potential in your kitchen.

Understanding Bosch Cooker Symbols

Bosch cooker manuals often utilize a variety of symbols to convey instructions and information concisely. These symbols, while sometimes cryptic, are designed to be universal and easy to understand, regardless of language. Understanding these symbols is crucial for operating your Bosch cooker safely and effectively. The manual usually provides a dedicated section explaining each symbol, its meaning, and how it relates to specific cooking functions. For example, a symbol depicting a flame might indicate a gas burner, while a symbol resembling a heating element might represent an electric burner.

Symbols are often used to represent specific cooking modes, such as baking, grilling, or roasting. They might also indicate temperature settings, timer functions, or safety features. Familiarizing yourself with these symbols allows you to navigate your cooker’s controls with confidence and ensure you select the appropriate settings for your desired cooking outcome. Pay close attention to symbols related to safety features, as they might indicate potential hazards or necessary precautions. By understanding the language of these symbols, you can unlock the full potential of your Bosch cooker and enjoy a seamless and enjoyable cooking experience.

Bosch Cooker Maintenance and Troubleshooting

Bosch cooker manuals place a strong emphasis on regular maintenance and troubleshooting, recognizing that proactive care can extend the life of your appliance. The manuals often provide detailed instructions on cleaning various components, including the oven cavity, hob, and grill. They might suggest specific cleaning agents and tools, as well as recommended cleaning frequencies. The manuals also highlight the importance of maintaining a clean and clutter-free cooking space, preventing the accumulation of grease and debris that can hinder performance and potentially cause safety hazards.

Beyond routine cleaning, the manuals offer guidance on troubleshooting common issues that might arise with your Bosch cooker. This includes addressing problems related to heating, temperature control, timer functions, and overall appliance operation. They might suggest troubleshooting steps like checking the power supply, resetting the appliance, or inspecting for faulty components. The manuals often provide a flowchart-like approach to troubleshooting, guiding you through a series of checks and solutions to pinpoint the root cause of the issue. By following these instructions, you can often resolve minor problems independently, avoiding the need for costly repairs.

Safety Instructions for Bosch Cookers

Bosch cooker manuals prioritize safety, providing comprehensive instructions to ensure safe operation and minimize the risk of accidents. The manuals emphasize the importance of following all safety guidelines, including those related to electrical connections, proper ventilation, and handling hot surfaces. They might provide specific warnings regarding the dangers of using flammable materials near the appliance, as well as the potential risks associated with improper installation or modifications. The manuals might also include information on how to safely clean and maintain the cooker, emphasizing the need to unplug the appliance before cleaning and avoiding the use of abrasive cleaning agents that could damage the surfaces.

The manuals often highlight the importance of supervision, especially when children are present. They may provide specific advice on keeping children away from the cooker while it’s in operation and educating them about the dangers of touching hot surfaces. The manuals might also recommend installing safety devices like oven door locks or hob guards to further enhance child safety. By adhering to these safety guidelines, you can create a safer cooking environment for yourself and your family.

Accessing Bosch Cooker Manuals Online

In today’s digital age, Bosch has made it incredibly convenient to access cooker manuals online. The company’s website offers a user-friendly platform where you can search for your specific appliance manual by entering the model number (E-Nr) found on the rating plate or sticker attached to your cooker. This online library provides comprehensive documentation, including instructions for installation, usage, maintenance, and troubleshooting common issues. Additionally, you can access manuals for older models, ensuring you have the information you need regardless of your appliance’s age. The website might also offer a model number finder tool to assist in locating the E-Nr if you’re having trouble finding it on your appliance.

Beyond Bosch’s official website, other resources like ManualsLib offer a vast database of Bosch cooker manuals. You can search by model number or browse alphabetically through a list of available models. These platforms often provide downloadable PDF versions of the manuals, allowing you to access them offline. Additionally, websites specializing in appliance support and troubleshooting offer forums where users can ask questions and share information about their Bosch cookers, potentially finding solutions to specific problems or accessing user-generated content related to the manuals.

Bosch Cooker Service Assistant

The Bosch Service Assistant is a valuable tool designed to provide comprehensive support for Bosch home appliances, including cookers. This online resource consolidates all support options, tips, and tricks in one easy-to-use platform. It acts as a central hub for information related to your Bosch cooker, offering a convenient way to access everything you need in one place. The Service Assistant offers a wealth of information, including troubleshooting guides, maintenance tips, and answers to frequently asked questions. It also features a user-friendly interface that allows you to search for specific information or browse through various categories.

One of the key features of the Bosch Service Assistant is its ability to connect you with Bosch’s customer service team. You can contact them directly through the platform to receive personalized support for your specific appliance. The Service Assistant also provides links to Bosch’s online store, where you can purchase parts, accessories, and cleaning products for your cooker. By centralizing all these resources, the Bosch Service Assistant empowers you to take control of your appliance’s maintenance and troubleshooting, ensuring you have the information and support needed to keep it running smoothly.

Frequently Asked Questions About Bosch Cookers

Bosch cookers are renowned for their quality and performance, but you might have questions about their operation, maintenance, or specific features. Here are some frequently asked questions about Bosch cookers, along with helpful answers to guide you⁚

  • How do I find the model number of my Bosch cooker? The model number, often referred to as the E-Nr, is usually found on a rating plate or sticker attached to your appliance. It may be located on the inside of the oven door, near the bottom of the cooker, or on the back panel.
  • Where can I download a user manual for my Bosch cooker? You can access your Bosch cooker manual online by entering your appliance’s model number (E-Nr) on Bosch’s website. This allows you to download a digital copy of the manual for convenient reference.
  • What are the different types of Bosch cookers available? Bosch offers a wide range of cookers, including freestanding models, built-in ovens, and induction cooktops. They also provide various features, such as convection baking, self-cleaning functions, and different cooking modes.
  • How do I clean my Bosch cooker? Cleaning instructions for your Bosch cooker will be outlined in your user manual.

If you have any additional questions about your Bosch cooker, consult your user manual or contact Bosch customer service for assistance.

Bosch cooker manuals are essential tools for any owner seeking to maximize their appliance’s performance and longevity. By understanding the information contained within these manuals, you can ensure that your Bosch cooker operates safely and efficiently, providing you with years of culinary enjoyment.

From installation guidelines and usage instructions to maintenance tips and troubleshooting advice, Bosch cooker manuals offer a comprehensive guide to everything you need to know about your appliance. They empower you to confidently navigate the world of Bosch cooker features and functions, ensuring optimal results for all your culinary creations.

Remember to keep your manual readily available for quick reference, and don’t hesitate to consult it whenever you have questions or encounter any issues.

By prioritizing the use of your Bosch cooker manual, you invest in the well-being of your appliance, ensuring it serves you faithfully for many years to come.

Additional Resources

Beyond the official Bosch cooker manuals, a wealth of additional resources are available to enhance your understanding and ownership experience. These resources can provide valuable supplementary information, troubleshooting tips, and insights into the intricate workings of your Bosch cooker.

Consider exploring online forums and communities dedicated to Bosch appliances. These platforms are often teeming with helpful users who share their experiences, troubleshooting tips, and insights into specific models. You might find answers to questions you have, discover creative solutions to common problems, or even connect with other Bosch enthusiasts.

Don’t overlook the power of video tutorials. Many websites and platforms offer step-by-step video guides on various aspects of Bosch cooker operation, maintenance, and troubleshooting. These visual aids can be particularly helpful for understanding complex procedures or demonstrating specific techniques.

Remember, continued exploration and engagement with these additional resources can significantly enhance your understanding and enjoyment of your Bosch cooker, ensuring you get the most out of your culinary adventures;

Bosch Cooker Parts and Accessories

Expanding the functionality and enhancing the performance of your Bosch cooker is made possible through a range of parts and accessories specifically designed for your appliance. From essential replacement components to innovative tools that elevate your culinary experience, these options cater to various needs and preferences.

For those seeking to maintain the optimal performance of their Bosch cooker, replacement parts play a crucial role. Whether it’s a new oven rack, a replacement burner knob, or a fresh set of grill elements, these parts ensure your cooker continues to function flawlessly. Bosch offers a comprehensive selection of genuine parts, guaranteeing compatibility and quality.

Beyond essential replacements, Bosch cooker accessories can enhance your cooking experience in numerous ways. Consider investing in specialized cookware designed for induction cooking, ensuring optimal heat distribution and efficient cooking. Specialized baking trays and roasting pans can elevate your culinary creations, while additional oven racks provide more flexibility for multi-level cooking.

Remember, exploring the options for Bosch cooker parts and accessories allows you to customize your appliance, enhance its performance, and unlock a world of culinary possibilities.

Bosch Cooker Reviews and Ratings

Before making a significant investment in a Bosch cooker, it’s wise to delve into the world of reviews and ratings to gain valuable insights from other users. These insights can provide a comprehensive understanding of the strengths, weaknesses, and overall performance of various Bosch cooker models.

Online platforms like Amazon, Best Buy, and dedicated appliance review websites are treasure troves of user feedback. These reviews often offer detailed accounts of user experiences, covering aspects such as ease of use, cooking performance, features, and overall satisfaction.

Pay close attention to the ratings assigned to each Bosch cooker model. A numerical rating system, typically on a scale of 1 to 5 stars, can provide a quick gauge of overall satisfaction. Look for models consistently receiving high ratings, indicating a positive user experience.

Remember, while positive reviews are encouraging, it’s also important to consider negative feedback. Look for recurring themes or criticisms, as these may highlight potential drawbacks or common issues. A balanced approach to reviewing both positive and negative feedback will provide a more comprehensive and realistic understanding of the Bosch cooker model you’re considering.

Bosch Cooker Recipes and Cooking Tips

Unlocking the full potential of your Bosch cooker goes beyond simply following the manual’s instructions. Exploring a world of recipes and cooking tips tailored specifically for your appliance can elevate your culinary journey.

Bosch’s official website is a great starting point. Their online recipe library often features dishes designed to showcase the unique features and capabilities of their cookers. These recipes are meticulously crafted to ensure optimal results when using a Bosch appliance.

Beyond Bosch’s own resources, numerous online platforms are dedicated to sharing culinary inspiration. Websites like Allrecipes, Food Network, and Epicurious boast vast collections of recipes, many of which are suitable for Bosch cookers.

When searching for recipes, look for those specifically mentioning Bosch cookers or those compatible with similar oven types. Paying attention to cooking times and temperatures recommended for your particular Bosch model will ensure optimal results.

Remember, cooking is an art, and experimentation is encouraged. Don’t be afraid to adjust recipes based on your preferences and the unique features of your Bosch cooker. With time and practice, you’ll discover your own signature dishes, taking full advantage of the versatility of your Bosch appliance.

2004 ford expedition manual

2004 Ford Expedition Manual⁚ A Comprehensive Guide

This comprehensive guide provides all the information you need about the 2004 Ford Expedition‚ from its key features to its maintenance and repair. Whether you’re a new owner or a seasoned driver‚ this manual will help you get the most out of your vehicle. We’ll cover everything from the engine and performance to the exterior and interior design‚ safety features‚ technology‚ and more. We’ll also provide insights into common issues and solutions‚ as well as resources for finding a manual if you need it.

Introduction

The 2004 Ford Expedition‚ a full-size SUV known for its ruggedness and spacious interior‚ was a popular choice for families and adventurers alike. Its powerful engine‚ capable towing capacity‚ and versatile seating configurations made it a versatile vehicle for a wide range of needs. However‚ like any vehicle‚ the 2004 Expedition requires proper care and maintenance to ensure its longevity and optimal performance. This is where the owner’s manual comes in.

The owner’s manual for the 2004 Ford Expedition serves as a comprehensive guide to understanding and operating your vehicle. It contains valuable information on everything from basic operations like starting and driving to more complex topics like maintenance schedules‚ troubleshooting common issues‚ and understanding safety features. The manual also includes detailed diagrams‚ illustrations‚ and step-by-step instructions to make it easy to follow and understand.

Whether you’re a seasoned driver or a first-time owner‚ having the owner’s manual readily available is essential for maximizing the enjoyment and safety of your 2004 Ford Expedition. It’s your one-stop resource for all things related to your vehicle‚ ensuring that you have the knowledge and confidence to drive safely‚ maintain your vehicle properly‚ and address any issues that may arise.

Key Features of the 2004 Ford Expedition

The 2004 Ford Expedition was packed with features designed to enhance comfort‚ convenience‚ and safety. It was a spacious SUV with seating for up to eight passengers‚ making it ideal for families and those who need to carry a large group of people. The interior offered ample cargo space‚ accommodating luggage‚ gear‚ or even larger items with the seats folded down. It also boasted a powerful engine‚ providing ample power for towing and hauling‚ making it a reliable choice for those who need to transport heavy loads.

The 2004 Ford Expedition was equipped with a range of standard features including power windows‚ power locks‚ air conditioning‚ and a CD player. Some models came with additional features like a sunroof‚ leather upholstery‚ a premium sound system‚ and navigation. The SUV also had a reputation for its safety features‚ including multiple airbags‚ anti-lock brakes‚ and a traction control system‚ providing added peace of mind on the road.

The 2004 Ford Expedition was known for its reliability and durability‚ making it a popular choice for those who needed a vehicle that could handle the rigors of everyday driving and occasional off-road adventures. Its sturdy construction and powerful engine made it a capable SUV that could handle a variety of driving conditions‚ while its comfortable interior and ample features provided a pleasant driving experience.

Engine and Performance

The 2004 Ford Expedition was available with two engine options‚ both offering ample power and torque for a comfortable and capable driving experience. The standard engine was a 4.6-liter V8 that generated 232 horsepower and 292 lb-ft of torque. This engine provided sufficient power for everyday driving and towing lighter loads. For those seeking more power‚ a 5.4-liter V8 was also available‚ producing 250 horsepower and 350 lb-ft of torque. This engine was more than capable of handling heavier loads and provided a more responsive driving experience‚ especially when towing larger trailers.

Both engines were paired with a four-speed automatic transmission‚ which offered smooth gear changes and efficient power delivery. The 2004 Ford Expedition was known for its smooth ride and responsive handling‚ making it a comfortable and enjoyable vehicle to drive. The suspension system was well-tuned‚ providing a balance of comfort and control‚ even on rough roads. The Expedition’s high ground clearance and four-wheel drive system (available on some models) made it capable of handling light off-road conditions‚ adding to its versatility.

The 2004 Ford Expedition’s engine and performance characteristics made it a popular choice for families and individuals who needed a vehicle with ample power‚ towing capacity‚ and comfort. The SUV’s combination of powerful engines‚ smooth transmission‚ and well-tuned suspension provided a satisfying driving experience‚ making it a reliable and capable choice for a variety of driving needs.

Exterior and Interior Design

The 2004 Ford Expedition showcased a robust and commanding exterior design that reflected its status as a capable and spacious SUV. It featured a large‚ upright grille with a prominent Ford emblem‚ flanked by angular headlights that extended towards the fenders. The sculpted hood and bold lines along the sides added to the Expedition’s muscular stance. The rear end featured vertical taillights and a large tailgate‚ offering easy access to the spacious cargo area.

Inside‚ the 2004 Ford Expedition offered a comfortable and spacious cabin that prioritized practicality and family-friendly features. The interior featured durable materials and a straightforward layout‚ with a focus on functionality. The dashboard featured large‚ easy-to-read gauges and intuitive controls for the various comfort and convenience features. The seats were generously sized and offered ample support for both front and rear passengers. The Expedition’s cabin was designed to accommodate up to eight passengers‚ with ample legroom and headroom in all three rows.

The 2004 Ford Expedition’s interior also included a variety of storage compartments and cup holders‚ ensuring that passengers had plenty of space for their belongings. The spacious cargo area provided ample room for luggage‚ groceries‚ or other gear‚ making it ideal for families or individuals who frequently need to transport large items. The Expedition’s combination of practicality and comfort made it a popular choice for families and individuals who needed a spacious and versatile vehicle.

Safety Features

The 2004 Ford Expedition was equipped with a comprehensive suite of safety features designed to protect occupants in the event of an accident. Standard safety features included dual front airbags‚ side airbags for front passengers‚ and a driver’s knee airbag. The Expedition also featured a safety canopy system‚ which provided head curtain protection for all three rows of passengers. The safety canopy deployed in the event of a rollover or side impact‚ helping to mitigate head injuries.

In addition to airbags‚ the 2004 Ford Expedition featured a robust safety cage constructed of high-strength steel‚ designed to absorb and dissipate crash energy. The vehicle also included anti-lock brakes (ABS) with electronic brakeforce distribution (EBD)‚ which helped to prevent wheel lockup during emergency braking and maintain steering control. Traction control and stability control systems were also standard‚ working together to enhance the vehicle’s handling and prevent skids.

The 2004 Ford Expedition’s safety features were designed to provide a high level of occupant protection in a variety of crash scenarios. The combination of airbags‚ a strong safety cage‚ and electronic stability control systems made the Expedition a safe and reliable vehicle for families and individuals who prioritized safety.

Technology and Infotainment

The 2004 Ford Expedition offered a range of technology and infotainment features‚ catering to both practicality and entertainment needs. The standard audio system included a CD player with AM/FM radio and a cassette player‚ allowing for a variety of audio sources. The system often featured multiple speakers throughout the cabin‚ delivering a decent sound quality. For those seeking more advanced audio options‚ premium sound systems with a CD changer and MP3 compatibility were available.

While not as advanced as modern infotainment systems‚ the 2004 Ford Expedition did offer some innovative features. Some models came equipped with a navigation system‚ providing drivers with turn-by-turn directions and map guidance. Other technology features included a rearview camera‚ offering enhanced visibility for backing up and parking‚ and a tire pressure monitoring system‚ alerting drivers to low tire pressure. The Expedition also included a trip computer‚ providing real-time information on fuel economy‚ distance traveled‚ and other vehicle data.

Although lacking the connectivity and advanced features of modern vehicles‚ the technology and infotainment systems in the 2004 Ford Expedition still provided a comfortable and convenient driving experience. The integration of navigation‚ rearview camera‚ and tire pressure monitoring systems contributed to safety and driver convenience.

Fuel Efficiency and Emissions

The 2004 Ford Expedition was known for its powerful engine and spacious interior‚ but it wasn’t exactly known for its fuel efficiency. The vehicle’s large size and robust engine contributed to its relatively high fuel consumption. The standard engine‚ a 4.6-liter V8‚ delivered decent power but wasn’t particularly fuel-efficient‚ especially for a large SUV. The optional 5.4-liter V8 offered even more power but further increased fuel consumption.

The 2004 Ford Expedition’s fuel economy was generally in the range of 14 to 17 miles per gallon in the city and 18 to 20 miles per gallon on the highway. These figures were typical for large SUVs of that era‚ but they paled in comparison to modern vehicles with more fuel-efficient engines and technologies. While the 2004 Expedition’s fuel economy wasn’t its strongest point‚ it was still a capable vehicle for those who prioritized power and spaciousness.

In terms of emissions‚ the 2004 Ford Expedition met the emission standards of its time. The vehicle’s engine technology and exhaust system were designed to minimize harmful emissions‚ adhering to EPA regulations. However‚ it’s important to note that emission standards have evolved significantly since then‚ and modern vehicles offer much lower emissions.

Maintenance and Repair

Regular maintenance is crucial for keeping your 2004 Ford Expedition running smoothly and reliably. The owner’s manual outlines a comprehensive maintenance schedule that includes oil changes‚ filter replacements‚ tire rotations‚ and other essential services. Following this schedule helps prevent potential problems and ensures the longevity of your vehicle.

The 2004 Expedition‚ like any vehicle‚ is susceptible to wear and tear over time. Common maintenance tasks include replacing brake pads and rotors‚ checking and topping off fluids‚ inspecting belts and hoses‚ and ensuring proper tire pressure. It’s also essential to address any warning lights or unusual sounds that might indicate a problem.

For more complex repairs‚ it’s advisable to consult a qualified mechanic. The Ford Expedition’s engine‚ transmission‚ and other systems can be intricate‚ and improper repairs could lead to further damage. A reputable mechanic will have the expertise and tools to diagnose and fix issues effectively. When seeking repair services‚ it’s crucial to choose a shop that specializes in Ford vehicles and has a proven track record of quality work.

Common Issues and Solutions

While the 2004 Ford Expedition is a reliable vehicle‚ it’s not immune to common issues that can arise over time. Some of the most frequent problems include⁚

  • Transmission problems⁚ The 2004 Expedition’s transmission can experience issues like slipping‚ rough shifting‚ or complete failure. This can be caused by worn-out components‚ low fluid levels‚ or internal damage.
  • Engine problems⁚ The engine can suffer from oil leaks‚ misfires‚ or decreased performance. These issues might be related to worn spark plugs‚ faulty sensors‚ or a failing fuel pump.
  • Electrical problems⁚ The Expedition’s electrical system can experience malfunctions with lights‚ power windows‚ or the stereo. These issues often stem from faulty wiring‚ blown fuses‚ or a failing battery.
  • Suspension problems⁚ The suspension can develop problems like squeaking‚ clunking‚ or excessive bounce. Worn shocks‚ struts‚ or control arm bushings are common culprits.
  • Braking problems⁚ The braking system can experience issues like a soft pedal‚ squeaking‚ or pulling to one side. These problems might be caused by worn brake pads or rotors‚ a failing brake booster‚ or a leak in the hydraulic system.

If you encounter any of these issues‚ it’s essential to address them promptly to prevent further damage and ensure the safety of your vehicle. Consulting a reputable mechanic for diagnosis and repair is highly recommended.

Owner’s Manual Download

The 2004 Ford Expedition owner’s manual is readily available for download in PDF format. This comprehensive guide provides detailed information on various aspects of your vehicle‚ including its features‚ operation‚ maintenance‚ and safety. It’s a valuable resource for understanding your Expedition and ensuring its proper care. To access the manual‚ you can explore several online platforms dedicated to vehicle manuals.

Several websites offer free downloads of owner’s manuals for various vehicle makes and models. You can search for “2004 Ford Expedition owner’s manual PDF download” on a search engine to find these websites. Additionally‚ Ford’s official website may also provide access to downloadable manuals for their vehicles.

Downloading the manual is a convenient way to have it readily available on your computer or mobile device. You can refer to it anytime‚ anywhere‚ for quick answers to your questions or for a deeper understanding of your Expedition.

Where to Find a 2004 Ford Expedition Manual

Obtaining a 2004 Ford Expedition manual is a straightforward process‚ with several avenues available to you. The most convenient option is to download a digital copy from various online resources. Numerous websites dedicated to vehicle manuals offer free downloads of owner’s manuals for various makes and models‚ including the 2004 Ford Expedition. Simply search for “2004 Ford Expedition owner’s manual PDF download” on a search engine‚ and you’ll likely find several websites offering this service.

Additionally‚ you can check Ford’s official website for downloadable manuals for their vehicles. While not all manufacturers make manuals readily available‚ Ford has a history of providing access to digital copies of their owner’s guides.

If you prefer a physical copy‚ you can explore used bookstores‚ online marketplaces like eBay or Amazon‚ or even contact your local Ford dealership. While physical manuals might be harder to find‚ they offer a tangible and easily accessible resource.

Frequently Asked Questions

Here are some common questions about the 2004 Ford Expedition manual and its content⁚

  • Where can I find the VIN number for my Ford Expedition? The VIN number is typically located on a sticker attached to the driver’s side doorjamb or on a metal plate affixed to the dashboard.
  • Where could I locate the VIN number for my Ford? The VIN number is typically located on a sticker attached to the driver’s side doorjamb or on a metal plate affixed to the dashboard.
  • What if I have questions about my 2004 Ford Expedition that aren’t covered in the manual? You can consult online forums dedicated to Ford vehicles or reach out to your local Ford dealership for assistance.
  • Are there manuals available for other years of the Ford Expedition? Yes‚ many websites offer manuals for different years of the Ford Expedition. You can typically find them by specifying the year of your vehicle when searching for the manual.
  • Is the 2004 Ford Expedition owner’s manual available in languages other than English? While the online availability of manuals in other languages might vary‚ Ford typically provides English manuals for their vehicles.

Remember‚ the owner’s manual is a comprehensive guide to your vehicle. If you have any questions or concerns‚ don’t hesitate to consult it or reach out to Ford for assistance.

The 2004 Ford Expedition manual is an invaluable resource for any owner‚ offering a comprehensive guide to understanding and maintaining your vehicle. From basic operation to advanced troubleshooting‚ the manual provides clear and detailed information on every aspect of your Expedition. While online resources offer readily accessible digital copies‚ the printed manual can be a valuable addition to your vehicle’s documentation.

By studying the manual‚ you can familiarize yourself with the vehicle’s features‚ safety systems‚ and maintenance procedures. This knowledge empowers you to operate your Expedition safely and efficiently‚ maximizing its performance and longevity. Remember‚ the manual is more than just a collection of instructions; it’s a guide to unlocking the full potential of your 2004 Ford Expedition.

Whether you’re a seasoned driver or a new owner‚ take the time to explore the manual’s contents. You’ll be surprised by the wealth of information it offers and how it can enhance your driving experience.

samsung un32eh4003f manual

This manual provides comprehensive instructions for using the Samsung UN32EH4003F television. It covers topics such as remote control‚ initial setup‚ troubleshooting‚ picture and sound settings‚ channel management‚ and timer features. This manual aims to guide you through all aspects of operating your Samsung UN32EH4003F and maximizing your viewing experience.

Introduction

Welcome to the world of Samsung televisions! This manual serves as your guide to the Samsung UN32EH4003F‚ a 32-inch television designed to deliver exceptional picture quality and a user-friendly experience. This manual will provide you with detailed instructions on how to set up‚ operate‚ and troubleshoot your new television. From navigating the menus to customizing your viewing preferences‚ this manual covers everything you need to know to get the most out of your Samsung UN32EH4003F.

Remote Control and Accessories

Your Samsung UN32EH4003F comes equipped with a user-friendly remote control and a set of essential accessories. The remote control‚ model AA59-00666A‚ provides intuitive access to all the TV’s features‚ including channel selection‚ volume control‚ menu navigation‚ and more. It requires two AAA batteries (not included). Along with the remote‚ you’ll find a warranty card and safety guide‚ providing important information on product care and usage. The package also includes a wire-holder stand (BN61-05491A) for stable placement. You’ll need to purchase input cables separately for connecting external devices‚ such as DVD players or gaming consoles.

Warranty and Safety Guide

The Samsung UN32EH4003F comes with a warranty card that outlines the terms and conditions of your product coverage. It’s crucial to retain this card for any future warranty claims. The warranty card provides details about the duration of the warranty‚ covered components‚ and any exclusions. Additionally‚ the safety guide included with your TV outlines essential safety precautions for using and maintaining your device. It covers topics like proper ventilation‚ electrical safety‚ and the correct handling of the television to prevent damage or injury. Always refer to the safety guide for detailed instructions and follow its recommendations for safe and responsible use.

Initial Setup and Plug & Play

The Samsung UN32EH4003F features a user-friendly Plug & Play setup process. When you power on the TV for the first time‚ a series of on-screen prompts will guide you through the initial setup. These prompts will walk you through steps like language selection‚ connecting to your Wi-Fi network‚ and setting up your preferred picture and sound settings. The intuitive interface makes the process straightforward‚ even for first-time users. The TV will automatically scan and memorize available channels‚ allowing you to start enjoying your favorite programs quickly; This Plug & Play feature simplifies the initial setup experience‚ enabling you to enjoy your TV without complex configuration steps.

Troubleshooting and Support

This manual includes a troubleshooting section to address common issues you might encounter with your Samsung UN32EH4003F. It provides solutions for problems like no picture‚ no sound‚ or issues with channel reception. For more in-depth troubleshooting assistance‚ you can visit the Samsung website and access their online support resources. The website offers comprehensive troubleshooting guides‚ videos‚ and FAQs to help you resolve any technical difficulties. If you’re unable to find the solution you need online‚ you can contact Samsung’s customer support team directly for personalized assistance. They offer phone and email support options to address any specific issues you might have.

Samsung UN32EH4003F Specifications

The Samsung UN32EH4003F boasts a 31.5-inch display diagonal‚ offering a satisfying viewing experience. With a resolution of 1366 x 768 pixels‚ it delivers clear and sharp images. The television supports graphics resolutions of 1366 x 768‚ ensuring compatibility with various devices; The UN32EH4003F also features video modes designed to enhance picture quality based on the content being viewed. This model incorporates a range of features to optimize your viewing experience‚ making it an excellent choice for everyday entertainment.

Manual Content Summary

This comprehensive manual for the Samsung UN32EH4003F covers a wide range of topics‚ providing detailed instructions and guidance for optimal use. From initial setup and troubleshooting to advanced picture and sound settings‚ you’ll find everything you need to get the most out of your television. The manual also includes information on channel management‚ timer features‚ and fine-tuning for optimal reception. Whether you’re a first-time user or a seasoned viewer‚ this manual will equip you with the knowledge to navigate and enjoy all the features of your Samsung UN32EH4003F.

Channel List and Program Guide

The Samsung UN32EH4003F offers a user-friendly channel list and program guide‚ allowing you to easily navigate and access your favorite channels and programs. The manual provides detailed instructions on how to access and utilize the channel list‚ including options for adding‚ deleting‚ and organizing channels. It also explains how to use the program guide‚ which displays a schedule of upcoming programs for each channel. You can also schedule programs for viewing at a later time‚ making it easier to plan your viewing schedule; The manual also provides guidance on accessing digital program lists‚ which display detailed information about each program‚ including descriptions‚ ratings‚ and cast information.

Picture Settings and Adjustments

The Samsung UN32EH4003F manual provides detailed instructions on how to customize your viewing experience by adjusting various picture settings. These settings allow you to fine-tune the image quality to your preferences‚ ensuring optimal viewing for different content types. The manual covers key picture settings such as brightness‚ contrast‚ sharpness‚ color‚ and tint. It also explains how to use the Digital Noise Filter feature to reduce static and ghosting when receiving a weak signal. You can even adjust the aspect ratio to suit your screen size and content format. For those who enjoy watching movies‚ the manual highlights the Movie picture mode‚ specifically designed for an optimal cinematic experience.

Sound Settings and Adjustments

The Samsung UN32EH4003F manual guides you through optimizing the audio experience with a variety of sound settings. You can adjust the volume‚ balance‚ and treble to suit your listening preferences. The manual highlights the SRS TruSurround HD technology‚ which enhances the sound experience by creating a virtual surround sound effect through the TV’s speakers. This feature is especially useful for enjoying multichannel audio content‚ providing a more immersive experience. The manual also covers the selection of audio tracks‚ allowing you to choose between stereo‚ mono‚ and separate audio program options‚ providing flexibility for different audio preferences and program formats;

Auto Program and Channel Memorization

The Samsung UN32EH4003F manual provides detailed instructions on how to automatically program and memorize channels. This feature simplifies the initial setup by automatically scanning and storing available channels from your chosen signal source‚ whether it’s an antenna or cable. The manual explains how to select the correct signal source (Air or Cable) and follow the on-screen prompts to initiate the channel memorization process. The manual also clarifies that the memorization process can take up to 45 minutes depending on the number of channels available. This process ensures that you have access to all the channels available in your area without manually searching and adding them individually.

Timer and Scheduling Features

The Samsung UN32EH4003F manual guides you through the various timer and scheduling features available on the TV. This includes setting a timer to automatically turn the TV on or off at specific times‚ scheduling specific channels or programs for viewing at a predetermined time‚ and managing a list of scheduled programs. The manual explains how to access the timer settings‚ set the current time accurately‚ and configure the timer and scheduling features for specific channels or programs. You can also customize the scheduling information‚ such as the start date and time‚ and easily view‚ modify‚ or delete scheduled programs using the dedicated channel list screens.

Channel List Management

The Samsung UN32EH4003F manual provides detailed instructions on managing your channel list effectively. It covers how to add or delete channels‚ organize them into favorites‚ and schedule specific programs for viewing. The manual also highlights various channel list screens and their functions‚ including the “Added Channels” list‚ which displays all available channels‚ and the “Favorite Channels” list‚ which allows you to quickly access your preferred programs. The manual further explains how to use the “Tools” menu to manage the channel list‚ including adding or deleting channels from the “Added Channels” list‚ organizing your favorite channels‚ and scheduling programs for viewing.

Fine-tuning and Channel Reception

The Samsung UN32EH4003F manual provides guidance on fine-tuning channels for optimal reception. It explains that while the automatic channel search and store function usually ensures clear reception‚ manual fine-tuning may be necessary if the signal is weak or distorted. The manual outlines the steps involved in fine-tuning a channel‚ emphasizing the use of the “Fine Tune” option within the channel selection menu. It also clarifies that fine-tuned channels are marked with an asterisk next to the channel number for easy identification. Additionally‚ the manual addresses potential issues with channel reception and provides troubleshooting tips for resolving common problems.

Clock and Timer Settings

The Samsung UN32EH4003F manual provides detailed instructions for setting the clock and utilizing the various timer features. It explains how to set the current time using the remote control‚ emphasizing the importance of accurate timekeeping for using the timer functions. The manual then outlines the different timer options available‚ including setting a sleep timer‚ a program timer for automatic channel switching‚ and a reminder timer for specific events. It provides step-by-step instructions for each timer function‚ ensuring users can easily schedule their viewing preferences and set reminders.

ge window air conditioner user manual

This manual provides instructions and information for using and maintaining your GE window air conditioner. It covers installation, controls, features, care and maintenance, troubleshooting, warranty and support, and additional resources. Please read this manual carefully before operating your air conditioner to ensure safe and efficient use.

Introduction

Welcome to the world of GE window air conditioners! This manual is your comprehensive guide to operating, maintaining, and troubleshooting your new appliance. We’ve designed this manual to be easy to understand, providing you with clear and concise information on every aspect of your air conditioner. Whether you’re a seasoned user or a first-time owner, this manual will equip you with the knowledge to maximize your comfort and enjoyment.

From understanding the controls and features to performing routine maintenance, we’ve covered everything you need to know. We’ve also included a troubleshooting section to help you resolve any common issues that may arise. Your GE window air conditioner is built to provide reliable cooling and comfort for years to come. By following the instructions in this manual, you can ensure its optimal performance and longevity.

Model and Specifications

This section provides detailed information about the specific model of GE window air conditioner you own. You’ll find essential specifications such as the cooling capacity (BTU), recommended room size, energy efficiency rating, and key features. This information is crucial for understanding the capabilities of your air conditioner and making informed decisions about its use.

Locate the model number and serial number on the unit itself or in the product documentation. These numbers are essential for accessing support resources, ordering parts, and registering your appliance. Your GE window air conditioner is designed to provide optimal cooling performance for your specific needs. By understanding its specifications, you can effectively use it to maintain a comfortable and cool indoor environment.

Installation Instructions

This section guides you through the step-by-step process of installing your GE window air conditioner. It covers the essential preparations, from measuring your window to ensuring proper electrical connections. The instructions are designed to be clear and easy to follow, even for first-time installers.

Before you begin, gather all the necessary tools and materials. These may include a screwdriver, level, tape measure, and any additional components provided with your air conditioner. Pay close attention to the safety precautions outlined in the manual, and always prioritize safety during the installation process. Installing your window air conditioner correctly ensures its proper function and optimal performance, maximizing your cooling comfort throughout the season.

Preparing the Window

Before installing your GE window air conditioner, you need to properly prepare the window to ensure a secure and airtight fit. This step involves measuring your window to determine the correct size of the air conditioner unit and verifying compatibility. Additionally, you may need to remove any window screens or other obstructions that could hinder installation.

It’s crucial to ensure the window is in good condition, without any cracks or damage. If necessary, you may need to repair or replace the window before proceeding with installation. Thorough preparation ensures a smooth installation process and a secure fit, maximizing the efficiency and effectiveness of your air conditioner.

Installing the Air Conditioner

Once you have prepared the window, you can begin installing your GE window air conditioner. This process involves carefully positioning the unit within the window frame and securing it in place with the provided mounting hardware. Ensure the air conditioner is level and securely mounted for proper operation.

Connect the power cord to a dedicated outlet. If your window is particularly large or if your air conditioner unit is heavy, it’s recommended to have a second person assist with the installation for safety reasons. It is essential to follow the specific instructions provided in the manual for your model, as installation procedures may vary slightly.

After installation, test the air conditioner to ensure it is working properly. Inspect the unit for any leaks or loose connections. If you encounter any difficulties during the installation process, refer to the manual or contact GE customer service for assistance.

Controls and Features

Your GE window air conditioner comes equipped with a variety of controls and features designed to provide you with optimal comfort and energy efficiency. The controls allow you to adjust the temperature, fan speed, and operating mode to suit your preferences. You can also select from different features, such as a timer, sleep mode, and a remote control.

The remote control provides convenient access to the air conditioner’s functions from a distance. It typically features buttons for adjusting temperature, fan speed, mode selection, and other settings. The air conditioner’s controls are usually located on the front panel and may include buttons, knobs, or a digital display.

Familiarize yourself with the functions of each control and feature to maximize your comfort and enjoyment of your GE window air conditioner. The manual provides detailed explanations of the controls and their operations.

Remote Control

The remote control is a convenient tool for operating your GE window air conditioner from a distance. It typically features buttons for adjusting temperature, fan speed, mode selection, and other settings. The remote control is powered by batteries, which may need to be replaced periodically.

To use the remote control, point it at the air conditioner’s receiver, which is usually located on the front panel. Press the desired buttons to adjust settings. Refer to the manual for a detailed explanation of the remote control’s buttons and their functions.

The remote control allows you to conveniently change settings without having to reach the air conditioner directly. This is especially useful when the air conditioner is installed in a high or difficult-to-reach location.

Air Conditioner Controls

Your GE window air conditioner features a control panel that allows you to adjust various settings for optimal comfort. The control panel typically includes buttons for temperature, fan speed, mode selection, and other features.

The temperature setting controls the desired room temperature. You can adjust it up or down to suit your preference. The fan speed setting determines the airflow rate. You can choose from low, medium, and high settings depending on your cooling needs. The mode selection button allows you to switch between different operating modes, such as cool, fan, and dehumidify.

The control panel also features indicator lights that show the current operating status of the air conditioner. The indicator lights may illuminate to indicate the selected temperature, fan speed, or operating mode. Refer to your GE window air conditioner’s manual for a detailed description of the control panel’s buttons, functions, and indicator lights.

Care and Maintenance

Regular care and maintenance of your GE window air conditioner will ensure optimal performance and longevity. A clean air filter is crucial for efficient air circulation and cooling. Remove the air filter from the unit and gently wash it with mild soap and water. Allow it to air dry completely before reinstalling it. Cleaning the grille and case of your air conditioner is essential to maintain its appearance and prevent dust build-up. Use a soft cloth dampened with mild soap and water to wipe down the surfaces. Avoid using abrasive cleaners or harsh chemicals.

The outdoor coils of your GE window air conditioner are responsible for releasing heat. Over time, dust and dirt can accumulate on these coils, reducing their efficiency. To clean them, use a vacuum cleaner with a brush attachment to remove loose debris. You can also gently rinse the coils with a garden hose, ensuring that the water does not enter the unit’s electrical components. After cleaning, allow the coils to dry completely before operating the air conditioner.

Cleaning the Air Filter

A clean air filter is essential for optimal performance and air quality. To clean the air filter, remove it from the air conditioner unit. Gently wash the filter with mild soap and water, ensuring to remove any dust or debris. Rinse the filter thoroughly and allow it to air dry completely before reinstalling it in the unit. Avoid using harsh chemicals or abrasive cleaners on the filter. For best results, clean the air filter every 2-4 weeks, or more often if it becomes visibly dirty. A dirty air filter restricts airflow, reducing the cooling efficiency of the air conditioner and potentially causing a buildup of dust and allergens in the room.

Cleaning the Grille and Case

To maintain the appearance and functionality of your GE window air conditioner, regular cleaning of the grille and case is important. Use a soft cloth dampened with mild soap and water to wipe down the exterior surfaces. Avoid using harsh chemicals or abrasive cleaners as they can damage the finish. Pay particular attention to the grille, as it can accumulate dust and debris over time. If necessary, use a soft-bristled brush to remove any stubborn dirt. After cleaning, dry the grille and case thoroughly with a clean cloth. Avoid spraying water directly into the air conditioner unit, as this can damage the internal components. Regular cleaning of the grille and case will help to keep your air conditioner looking its best and operating efficiently.

Cleaning the Outdoor Coils

The outdoor coils of your GE window air conditioner are responsible for releasing heat from the unit. Over time, they can become clogged with dust, dirt, and debris, which can reduce their efficiency. To clean the outdoor coils, unplug the air conditioner from the power outlet and remove the grille. Use a vacuum cleaner with a brush attachment to remove any loose dirt or debris. For more stubborn build-up, you can use a coil cleaning solution, available at most hardware stores. Apply the solution according to the manufacturer’s instructions and allow it to sit for a few minutes before rinsing it off with water. Make sure to dry the coils thoroughly before reassembling the air conditioner. Cleaning the outdoor coils regularly will help to ensure that your air conditioner operates at peak performance and extends its lifespan.

Troubleshooting

If your GE window air conditioner is not working properly, there are a few things you can try before calling for service. First, make sure that the air conditioner is plugged in and that the circuit breaker has not tripped. Check the air filter and clean it if it is dirty. Also, make sure that the air conditioner is not blocked by furniture or other objects. If you have checked all of these things and the air conditioner is still not working, you may need to contact a qualified technician for service. Refer to the troubleshooting guide included in your user manual for additional tips on resolving common issues.

Normal Operations

During normal operation, you may experience some sounds coming from your GE window air conditioner. These sounds are typically related to the unit’s operation and are not necessarily indicative of a problem. Some common sounds include a gentle humming noise from the compressor, a whirring sound from the fan, and a clicking sound as the thermostat cycles on and off. If you notice any unusual or excessive noises, it is best to consult your user manual or contact GE customer service for guidance. Additionally, a slight vibration may also be felt, particularly during the initial startup and shutdown phases. This is normal and usually subsides once the unit reaches a stable operating temperature.

Troubleshooting Issues

If you encounter issues with your GE window air conditioner, there are a few common problems and solutions you can try before contacting customer service. If the unit is not cooling properly, check that the air filter is clean and that the window is properly sealed. If the unit is making unusual noises, check that the unit is level and that there are no obstructions blocking the airflow. If the unit is leaking water, check that the drain hose is properly installed and that the condensation pan is not clogged. If you’re still experiencing problems, consult your user manual or contact GE customer service for further assistance. It is important to note that attempting to repair the unit yourself may void your warranty.

Warranty and Support

GE offers a comprehensive warranty on its window air conditioners. The specific terms and conditions of the warranty may vary depending on the model and purchase date. To access your warranty information, refer to the documentation that came with your air conditioner or visit the GE Appliances website. If you require technical support or have questions about your warranty, you can contact GE customer service by phone or online. The GE Answer Center is available 24/7 to provide assistance with product information, troubleshooting, and warranty claims. You can find the contact information for GE customer service in your user manual or on the GE Appliances website.

Warranty Information

GE offers a limited warranty on its window air conditioners, covering defects in materials and workmanship. The warranty period typically starts from the date of purchase and varies depending on the specific model and purchase location. The warranty covers repairs or replacements for defective parts, but may exclude certain components, such as filters or accessories. For detailed warranty information, including coverage terms, exclusions, and limitations, please refer to the warranty document that came with your air conditioner or visit the GE Appliances website. You can also contact GE customer service for any questions or clarification regarding the warranty coverage.

GE Service Numbers

For assistance with your GE window air conditioner, you can contact GE Customer Service directly by phone or online. The GE Answer Center phone number is 800-626-2000. You can also find a comprehensive list of GE service numbers, including specific numbers for different regions and product categories, on the GE Appliances website. These numbers can be used for a wide range of inquiries, including warranty information, product support, troubleshooting, and scheduling service appointments. In addition to phone support, GE also offers online support options such as live chat, email, and a knowledge base of frequently asked questions and troubleshooting guides.

Additional Resources

For further information and resources related to your GE window air conditioner, you can explore the following options⁚

  • GE Appliances Owner Manuals⁚ The GE Appliances website offers a comprehensive library of owner manuals for various appliances, including window air conditioners. You can search for specific models and download the relevant manuals for your air conditioner. These manuals provide detailed information about features, operation, care and maintenance, troubleshooting, and warranty information.
  • GE Answer Center⁚ The GE Answer Center is a valuable resource for finding answers to your questions about GE appliances. You can access a knowledge base of frequently asked questions, troubleshooting guides, and product information. You can also contact the GE Answer Center via phone or email for personalized support.
  • Online Support⁚ GE Appliances offers a variety of online support options for its customers. You can access online chat, email support, and a community forum where you can connect with other GE appliance owners and share your experiences. You can also find product information, troubleshooting guides, and frequently asked questions on the GE Appliances website.

GE Appliances Owner Manuals

For comprehensive information about your specific GE window air conditioner model, including features, operation, care and maintenance, troubleshooting, and warranty information, you can access the GE Appliances Owner Manuals website. This online library provides user manuals for a wide range of GE appliances, including window air conditioners. By searching for your specific model number, you can download a PDF version of the manual to your computer or mobile device. The manuals are organized by product category and model number, making it easy to find the information you need quickly.